Advantages of activity groups:
-
Visual representation in the timetable: Assign colours to each group to make your timetable easier to navigate.
-
Clear structure for multiple activities: Group related activities (e.g., by sport type or class level) for better oversight.
-
Possibility of group specific timetables: Create and share tailored schedules for each group, allowing clients to view and book only the activities relevant to them.
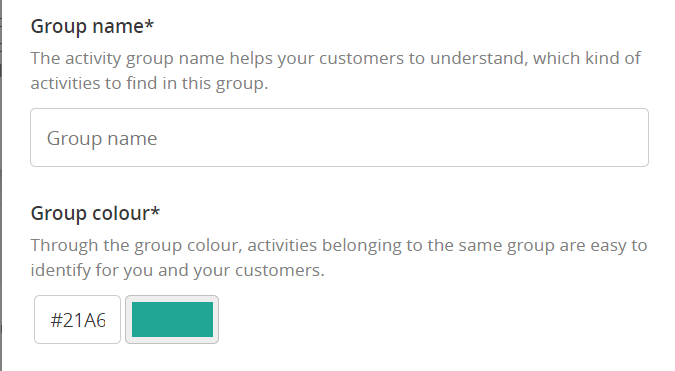
Create a new group:
To create a new group, click on “Create new group” when creating the activity.
Enter the group's name (e.g. subdivision by sport) and assign a color to this group. The selected colour will be shown on the timetable tile and applies to all activities assigned to this group. When creating an activity, simply select the relevant group and proceed with the setup.
Overview of activity groups
For a clear overview, all existing groups can be found under the tab Activities > Activity Groups.

Merge activity groups:
If you want to restructure your activities or simplify your group setup later on, you can easily combine two groups. Just select the group you want to move activities from and the one you want to merge them into.
You can also opt to delete the original group after merging.

Share timetable of one single activity group:
You can create a separate timetable for each activity group.
For example, if you’ve created a group for more intermediate classes and want to display only those on your website, go to Activities > Activity Groups and copy the link for that specific group.
Only the activities assigned to that group will appear in the widget.

Note: If you see a blank page, check whether the class calendar is activated in your widget settings (under the menu item "Settings" and the tab "Widget")