You want to get the most out of your online activities and digital content? With your Eversports Manager you can offer video recordings of your livestream-activities or on-demand videos.
With videos your customers can attend your studio's activities anytime they want, even outside opening hours.
1. Where to find the video library
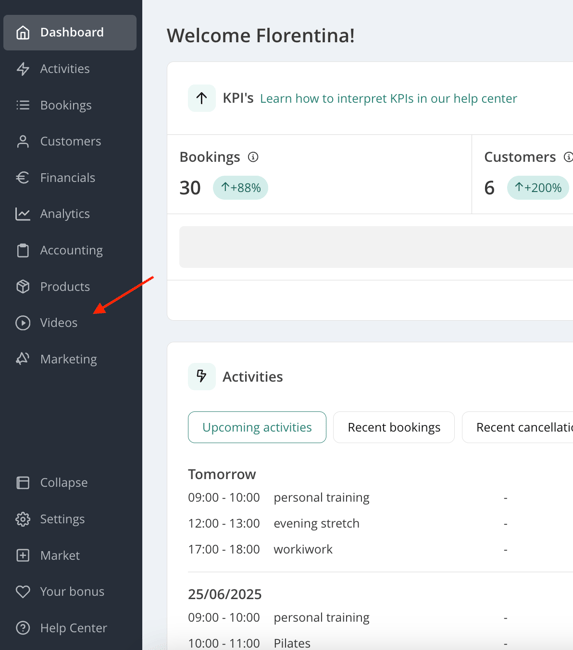
In order to use the video library, you have to click on Videos in the Manager.
2. What types of videos can I offer?
You can offer two type of videos:
-
On-demand video: Offer the recording of training or yoga class in the past, independently from any activity in your regular schedule.
-
Livestream replays: Offer recordings of your online class from your schedule.
3. How to create on-demand videos
To create a video, go to the menu Videos > New Video.
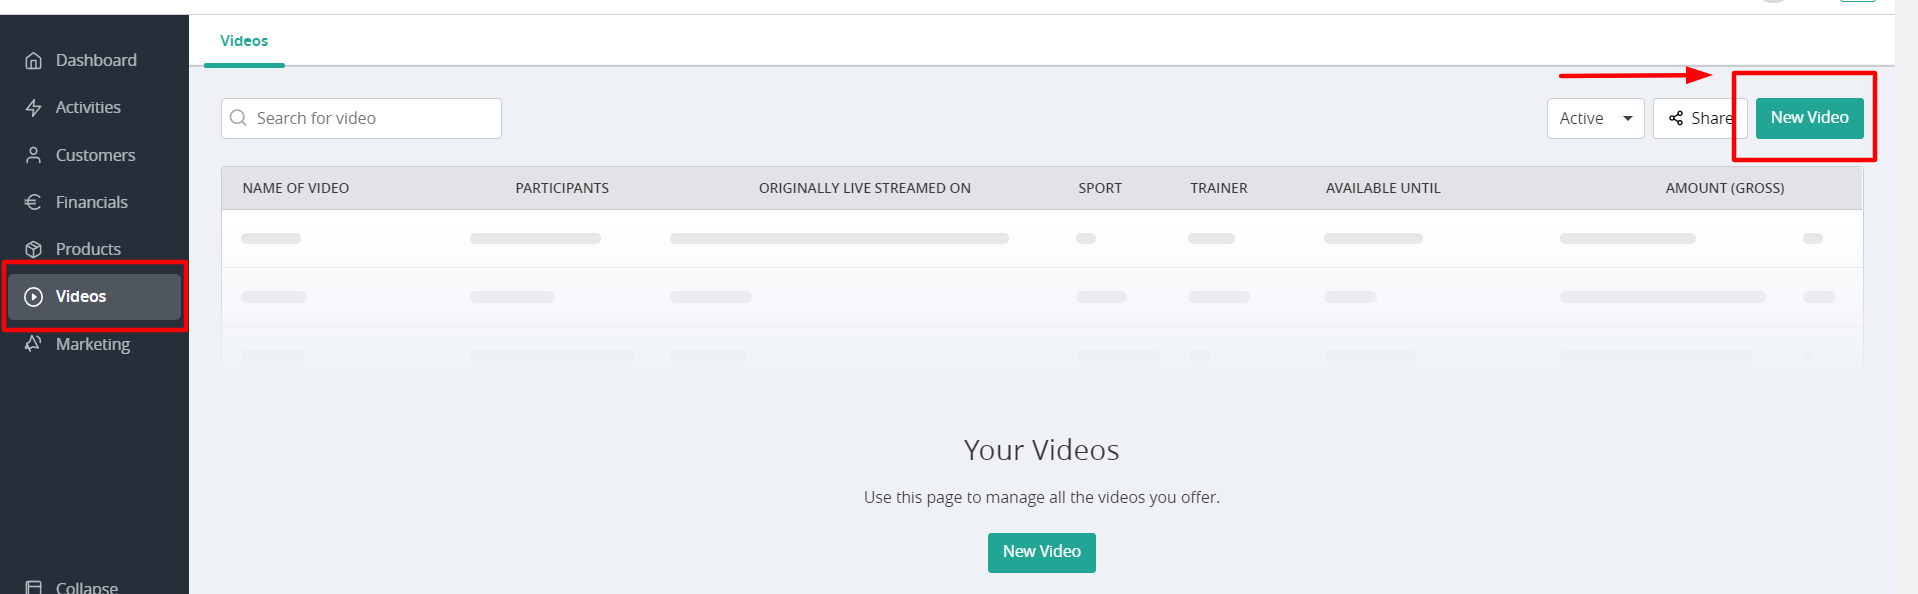
Now you can start creating your first video:
-
Fill out all mandatory information, e.g. title, description, category, sport
-
Add the video link of the recording where the video is hosted (i.e. Zoom library, YouTube, Google Drive etc.) and optionally choose a password.
-
Upload an image as the video's thumbnail (make sure it has 4:3 format for the best quality)
-
Select products that you allow the customer to access the video with
-
Define a price and a bookkeeping account for the video
-
Define the duration of which the video is available to watch after the customer has purchased the video.
-
Select the language of the video
Your Videos can be found:
- direct in your Manager under Videos.
- on the Marketplace and in the mobile App in your Studio Profile under Videos. Once you have created a video, the corresponding tab will automatically become visible.
- on your Widget. You can create a New Video Widget and integrate it on your Homepage.


4. How to create a Replay of an online class
How to create a replay of an online class step by step:
-
First of all, you need to select the correct bookkeeping account that will automatically be applied to purchases of video replays. To do this, go to the menu Settings > Master data and scroll to the section Tax Rates. Select here a bookkeeping account for purchases of livestream replays:
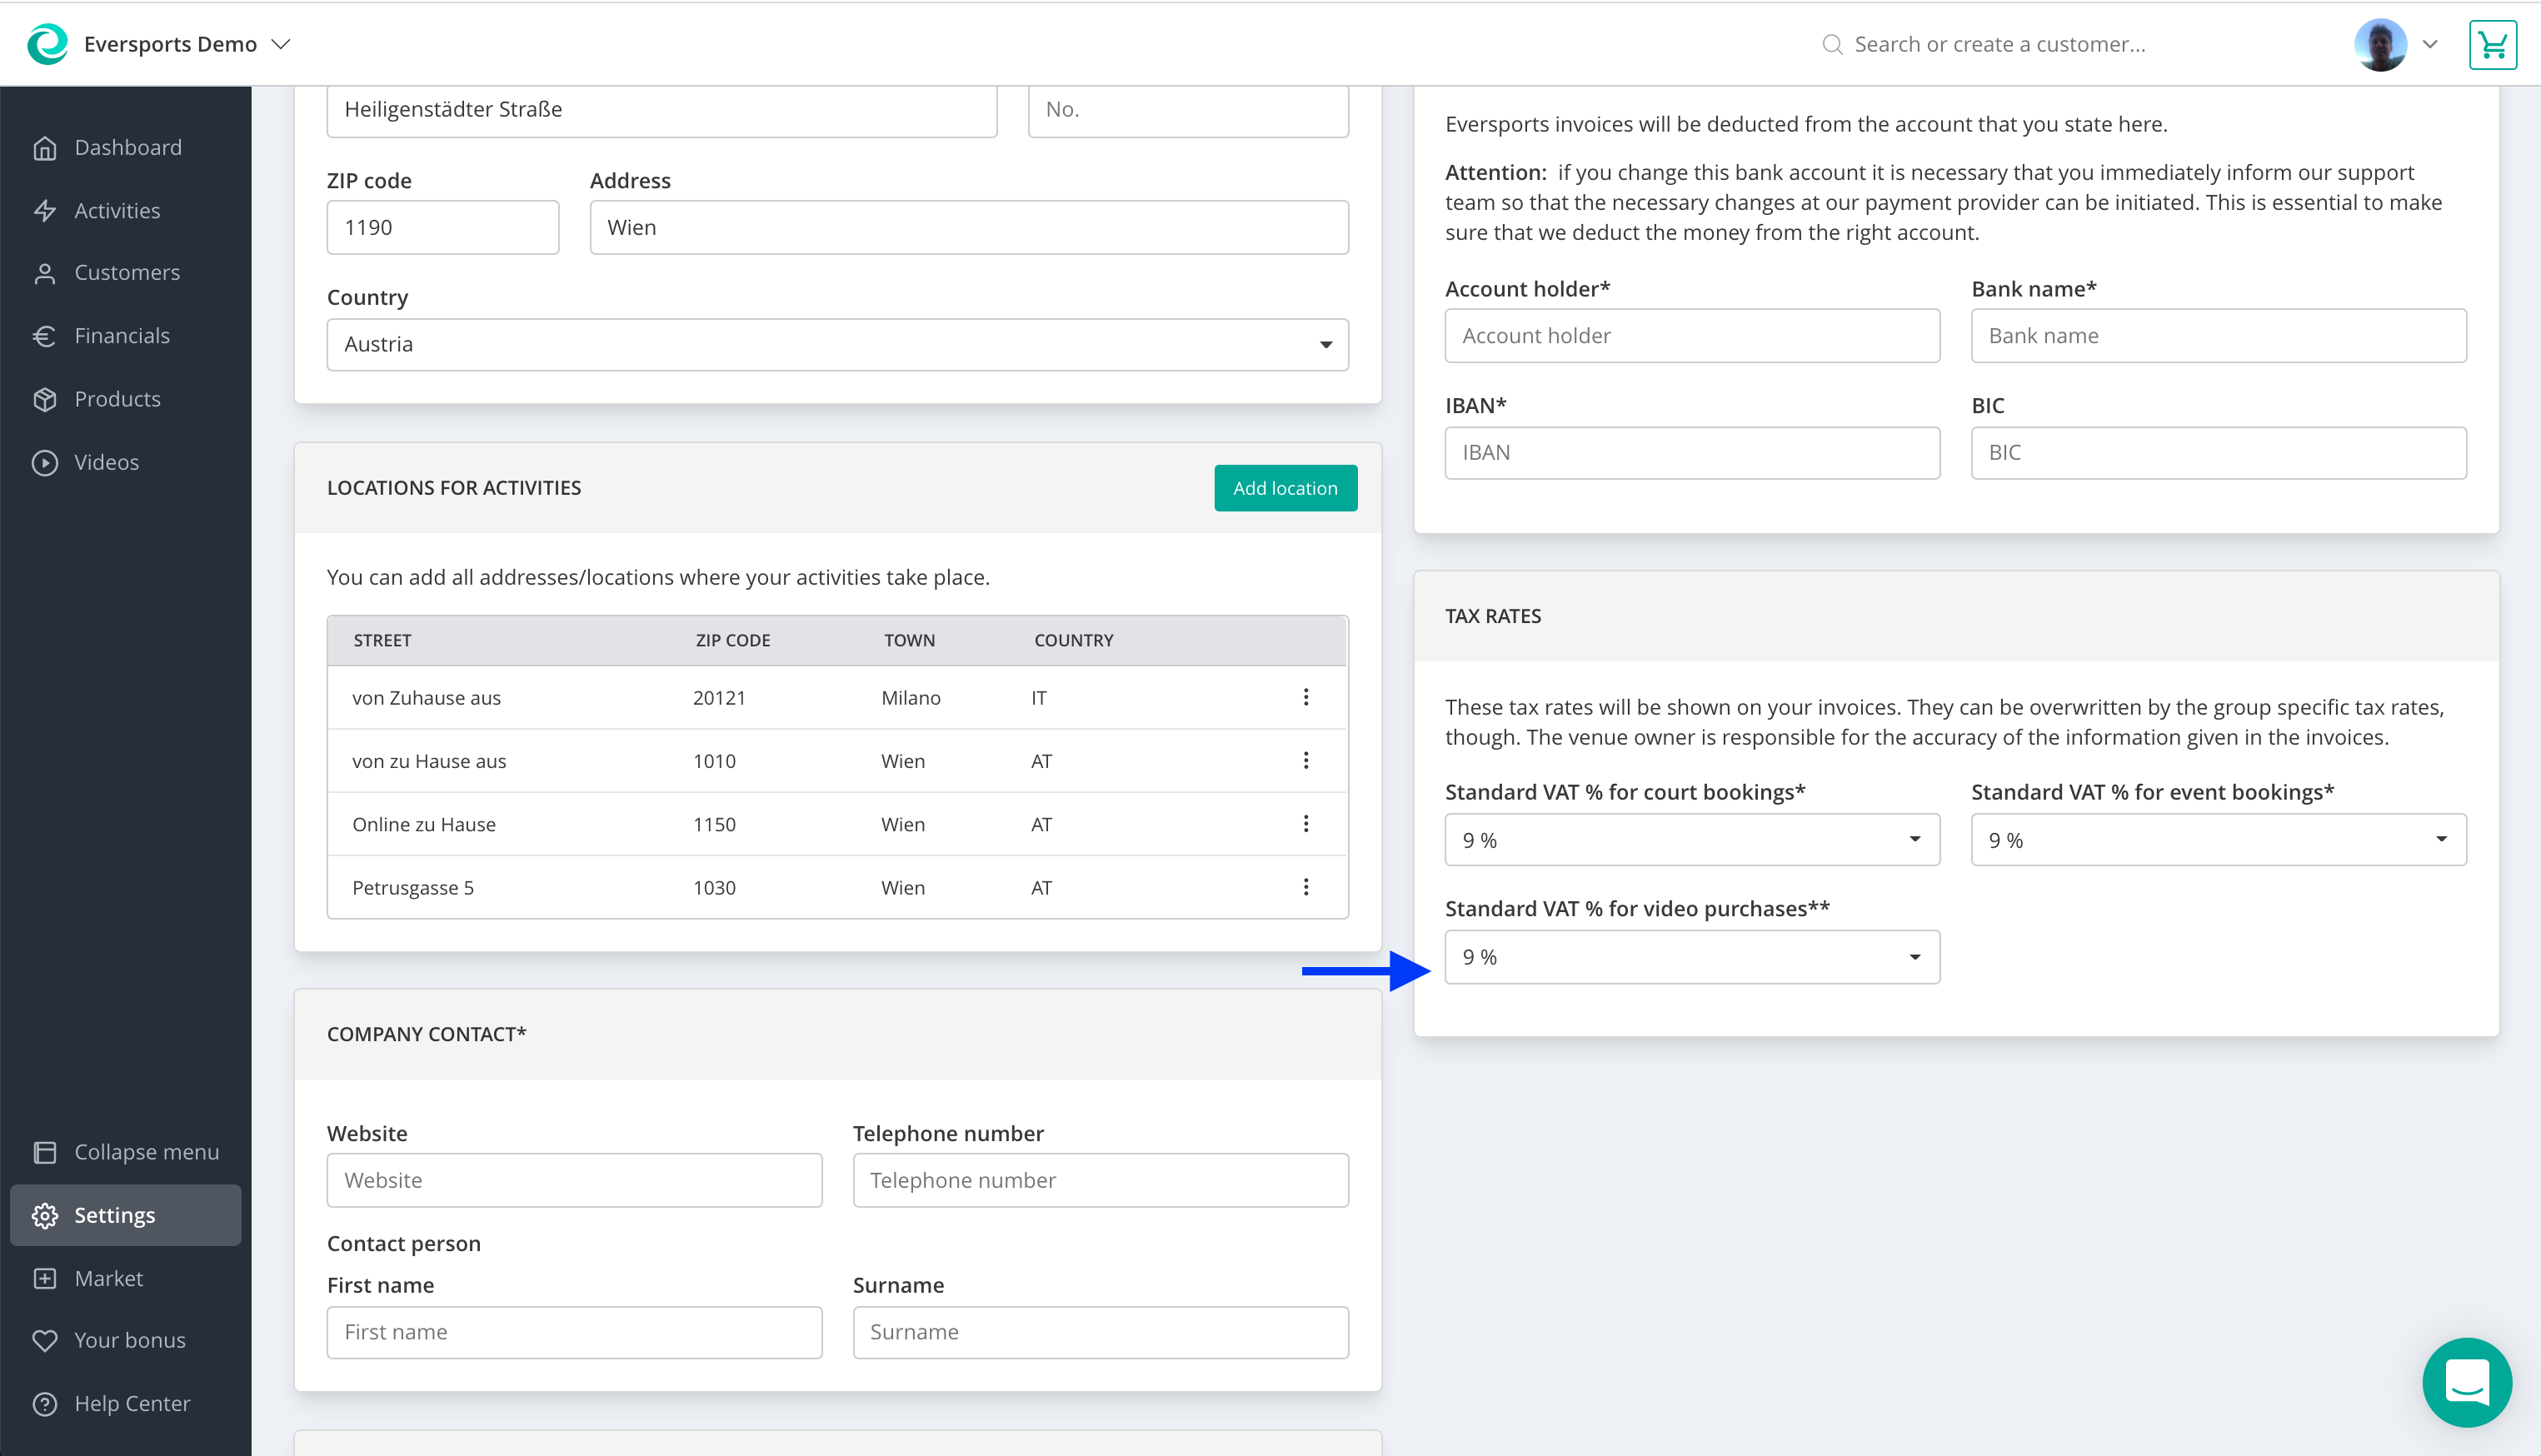
-
Then, go to the activity settings of the activity that you want to offer in your replays. In order to do this, go to Activities > Management and click on Edit.
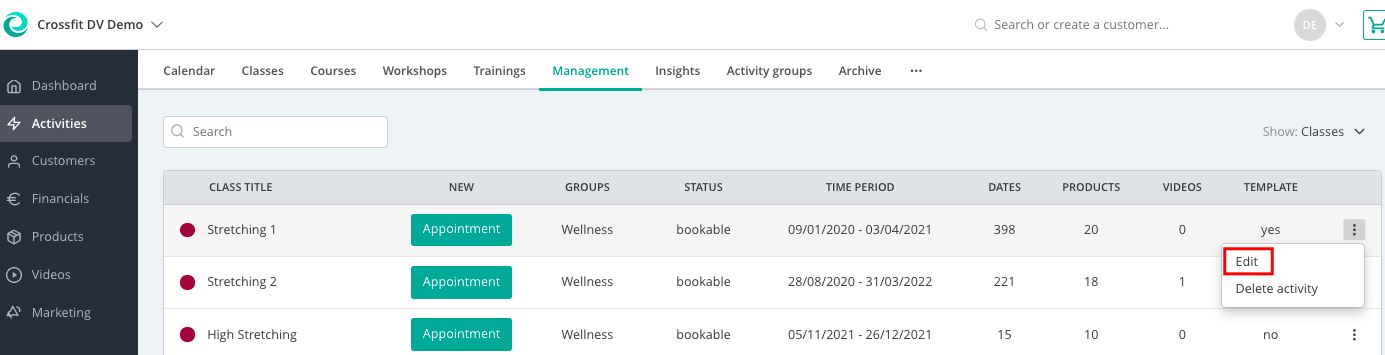
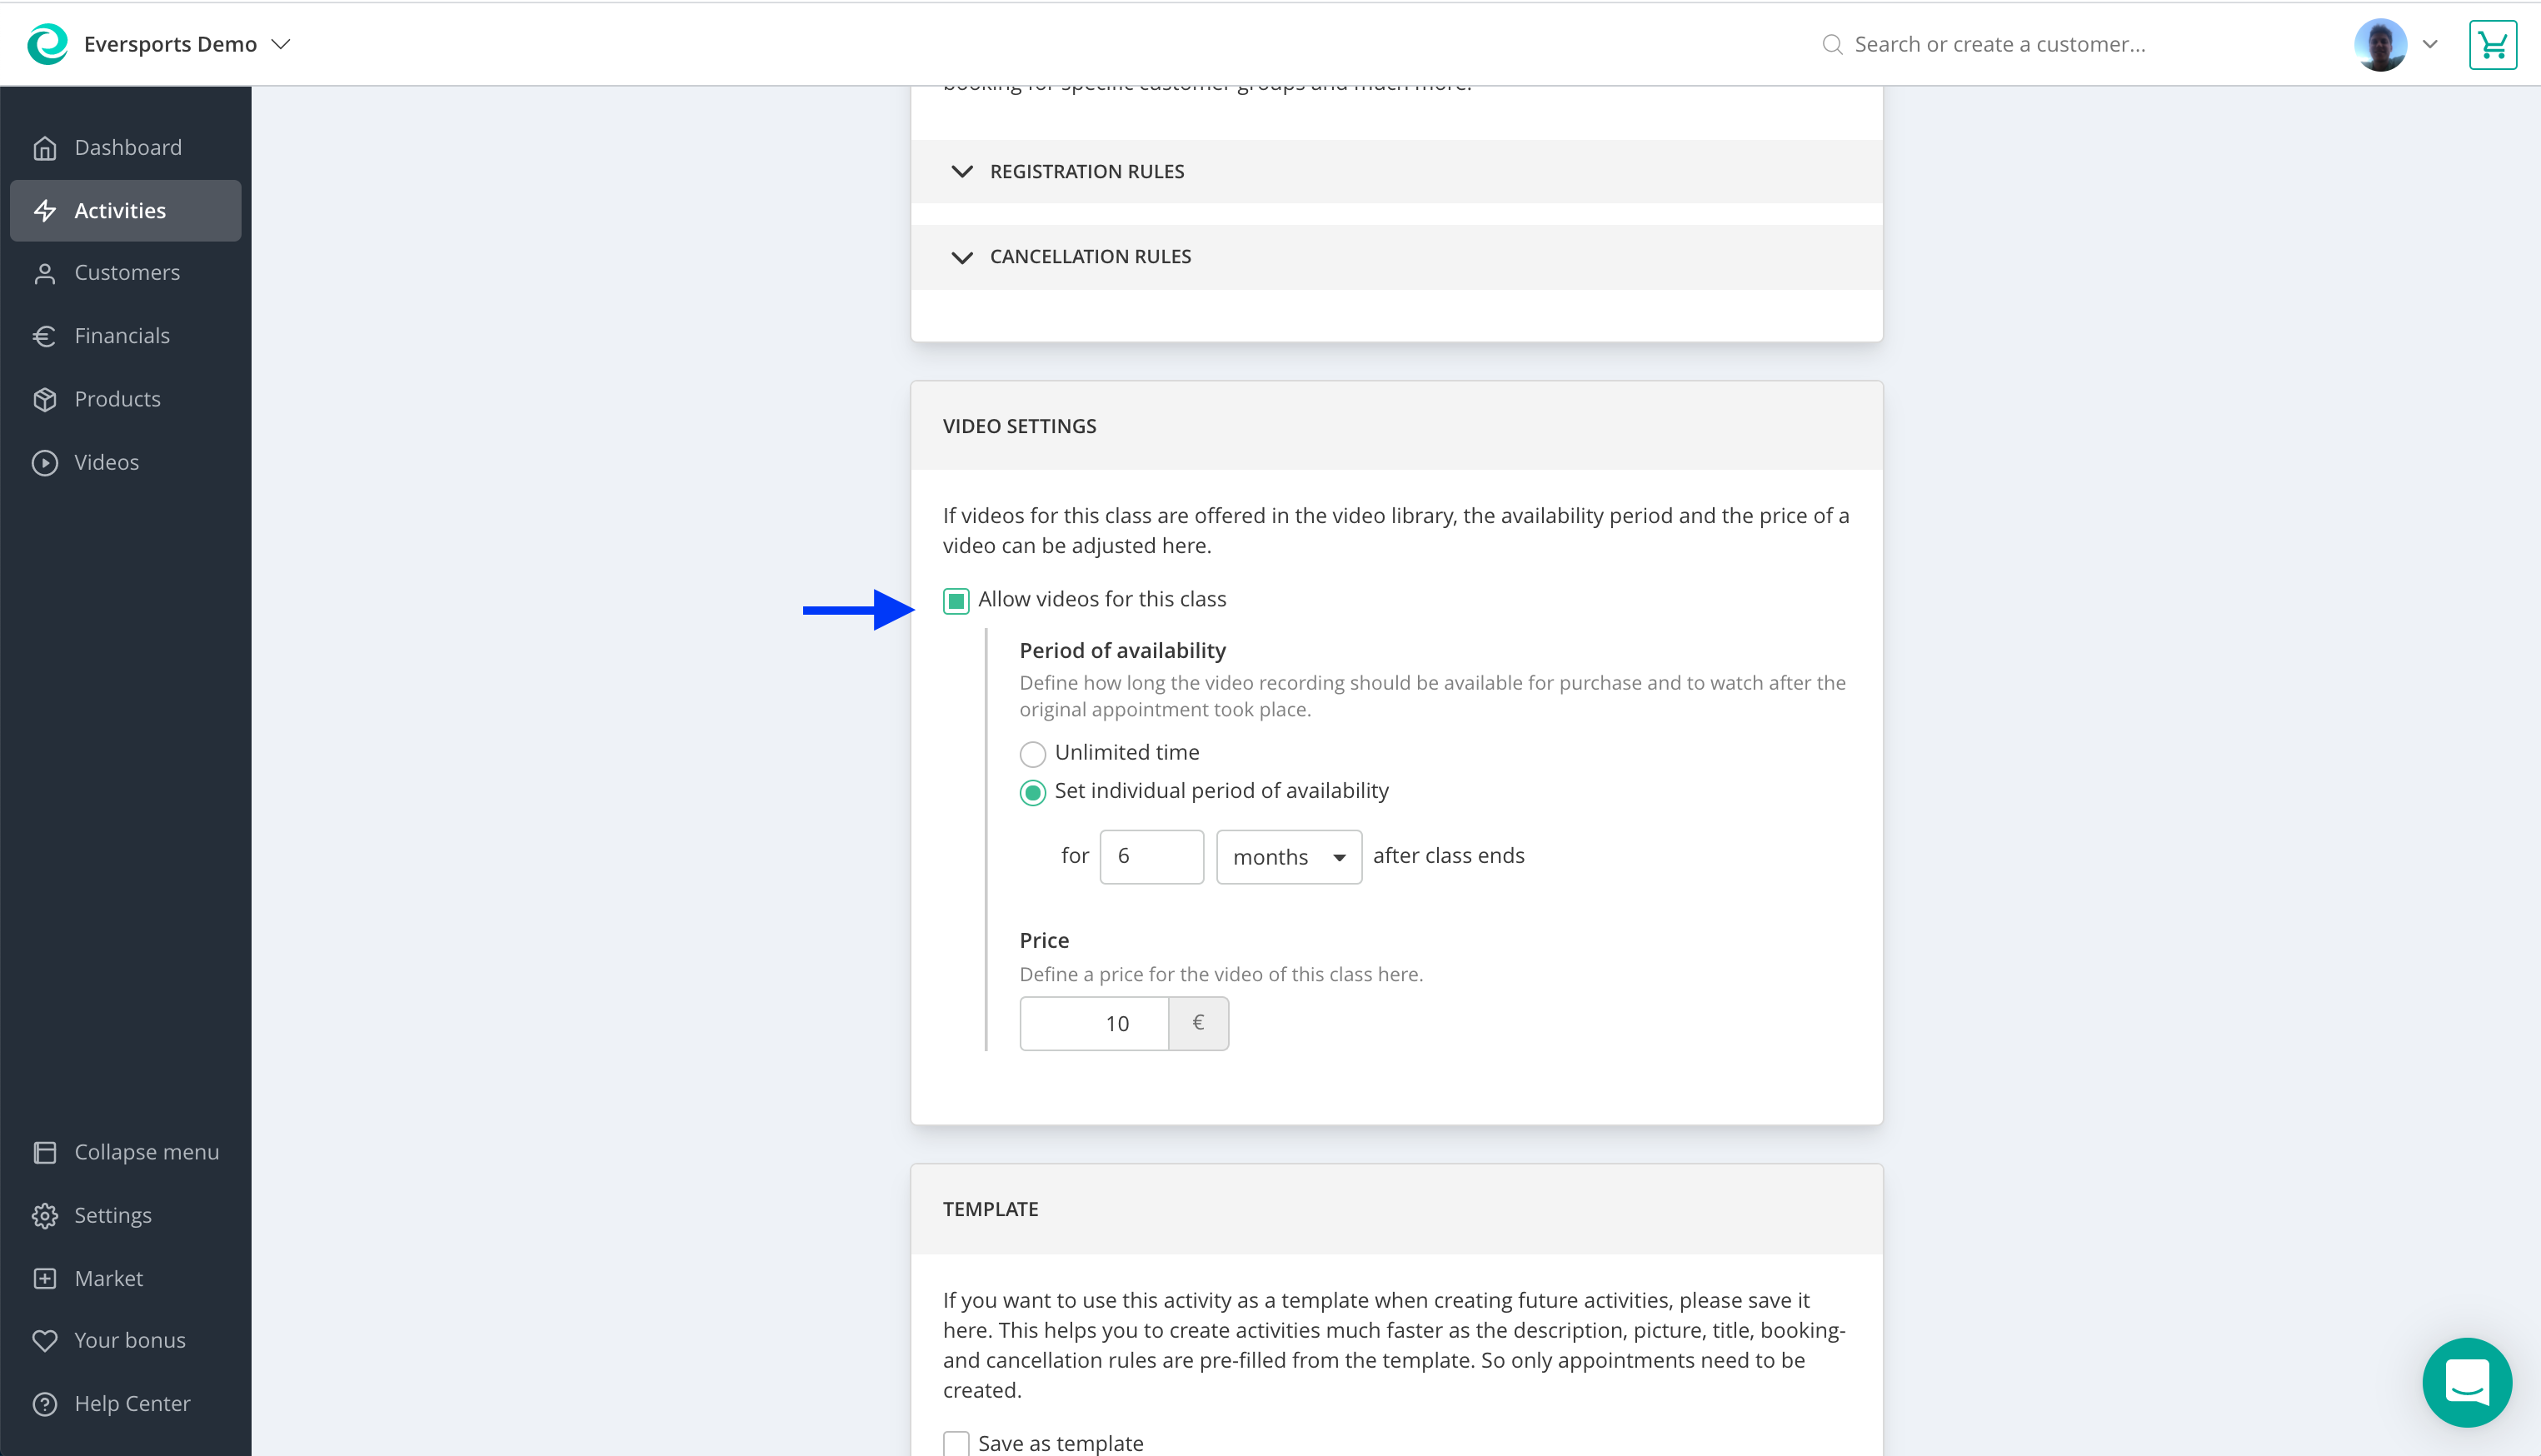
-
Go to Rules > Video Settings and enable Allow videos for this class. Here you can define how long the recording can be purchased for and accessed by the customer after the original class has taken place, as well as the price for a livestream replay of this activity.
By saving these activity settings, you have defined all necessary information for recordings of this activity.
-
Now you need to add video links for the session that you want to offer as a video.
-
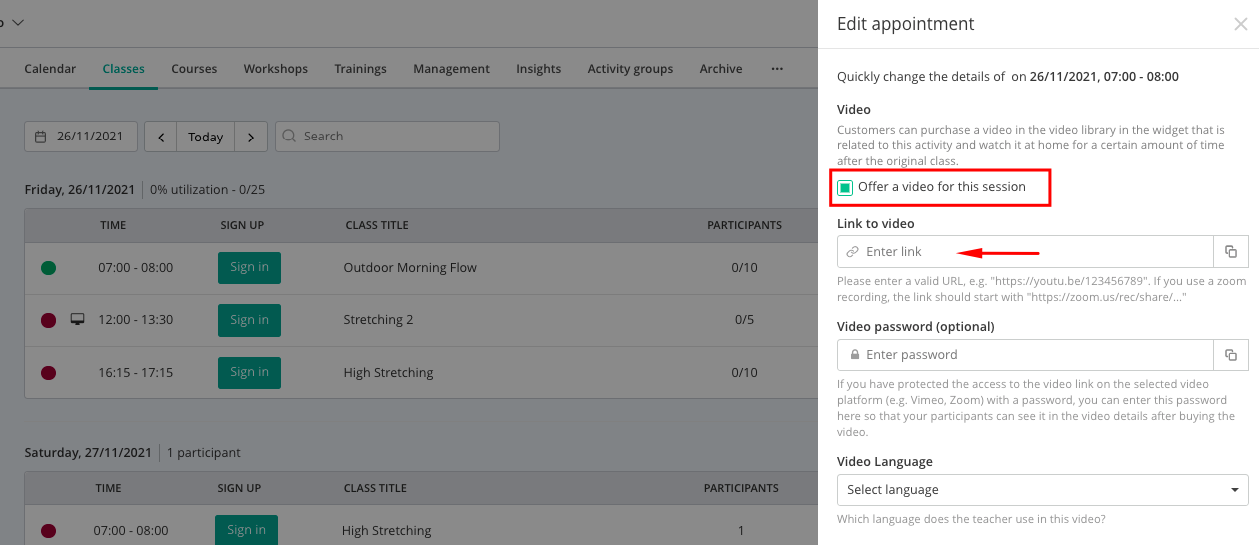
After the session has taken place, you can click on the three dots next to it on Edit appointment and select Offer a video for this session.
-
Add the video link to (and optionally a password).
The newly created video is now added to the list of videos in the menu Videos.
Note: When you create a video recording (Replay) of an online activity, all products connected to the original activity as well as the activity group are automatically selected for this video. You can change it afterwards in the video settings.
5. How can I promote my videos?
You can promote your video library or single videos for example on your website or your newsletter. The two options are:
-
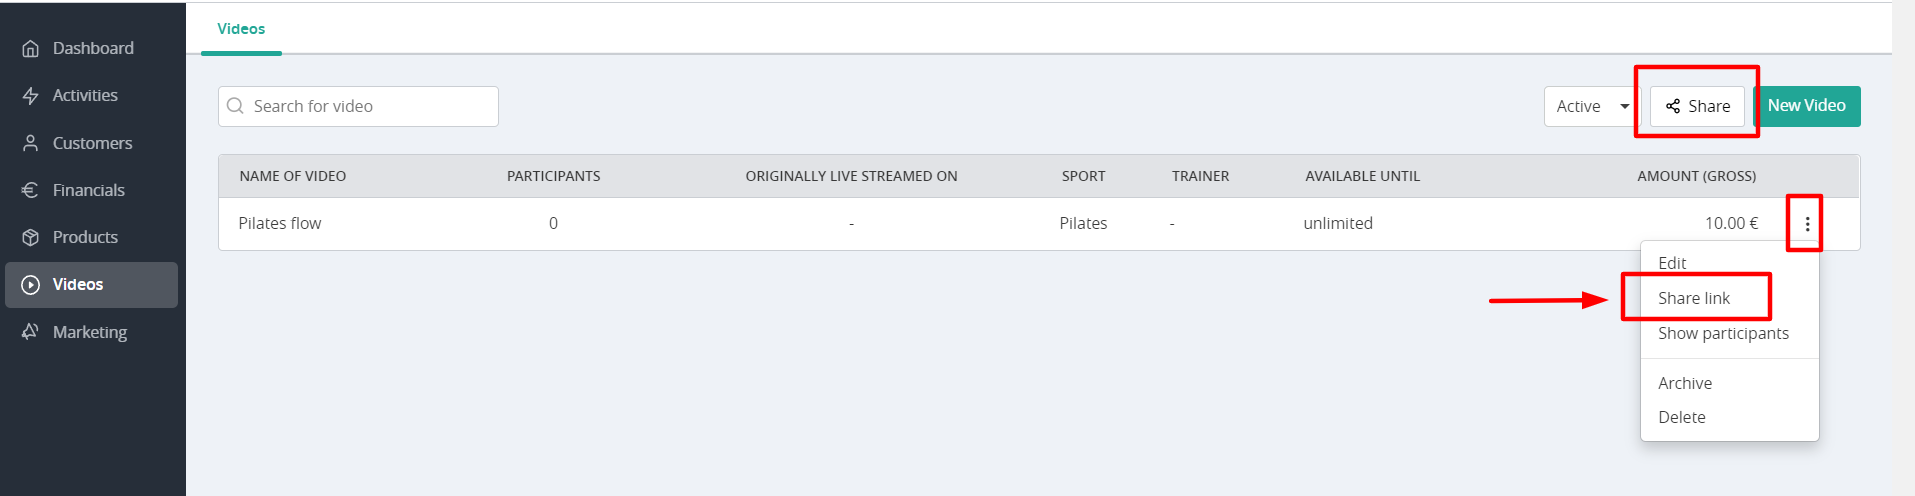
Share the link to your video library overview. In the menu Videos you can find it on the top right corner click on Share
-
Share the link to individual video: This can be found when you click on the 3 dots next to a video and then Share link