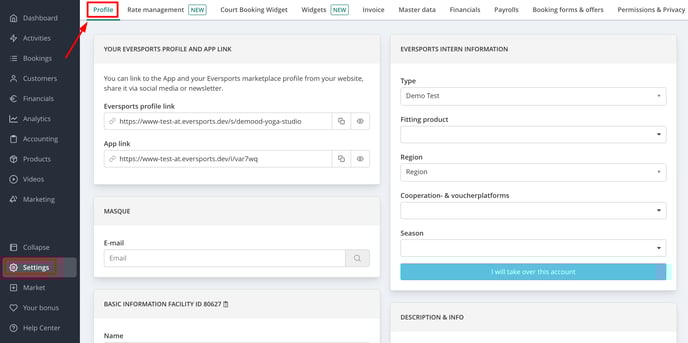
1. Where to Find Your Profile Settings
- Go to Settings > Profile in the Eversports Manager.
2. Complete Your Studio Profile Step by Step
2.1. Basic Information
- Studio Name:
This is the name displayed publicly to your customers. You can update it here if needed. - Sports Offered:
Select the specific types of sports you offer.
For example: instead of just “Yoga,” select “Hatha Yoga”, “Vinyasa Yoga”, etc.
🎯 The more specific your selection, the easier it is for customers to find your studio in the Eversports search.
📌 Note: If a sport you offer is trademark-protected or missing from the list, please contact Eversports Support.
⚠️ When USC API is activated: If you add or remove sports from your profile, please inform USC Support, as changes may prevent some USC members from seeing or booking your activities.
2.2. Contact Details
Add your contact information so customers can easily reach out.
Make sure to include your:
- Email address
- Phone number
- Website or social media (optional)
You can change your address by entering it in "New address".
2.3. Locations for Activities
- Add different locations for your activities here
- If you have outdoor-activities, then you can create an individual outdoor-location with this instruction.
- Only unused locations can be deleted. If you have a location, which is already used then please remove the location from the assigned activity-appointments.
Note: If you want to remove an old location that is still frequently used, our Support Team can help by replacing it with a new one across all activities. This way, the old location will be cleared and can then be safely deleted.
2.4. Sports courts & rooms for activities
If your studio has multiple rooms:
- Add each one here.
- When creating activities, you'll be able to assign the specific room.
- Teachers and customers will see this info in the timetable (if activated in the widget) or in the appointments so they know where to go.
2.5. Opening Hours
Add your regular opening times for display on your public profile.
Important: These opening hours are for display purposes only (they only show up in the app) and do not affect your actual class schedule or bookings.
If you don’t use seasonal schedules, simply create a season like:
- Name: All year round
- Period: January to December
2.6. Description and Studio Information
Write a short but compelling studio description to let potential customers know:
- What your studio stands for
- What makes it unique
- Why they should visit
2.7. Amenities
List the amenities available at your studio to improve your visitors’ experience.
For example:
- Changing rooms
- Showers
- Lockers
- Free parking
2.8. Profile Picture Settings
Upload up to 7 images to enhance your studio’s visual profile.
- Use for logo 1:1 format
- Use for all other pictures a 4:3 ratio (recommended: 1738 x 1303 px)
- The image marked with a green house icon will become your studio-logo
- Additional images are shown as cover photos
- Please find step-by-step-instructions here.
App Display: Your logo will not be shown in the app. Instead, the first profile picture is displayed to give customers a quick and engaging first impression of your studio.

Don’t Forget to Save!
Click Save Changes in the bottom-right corner to apply and publish your updates.
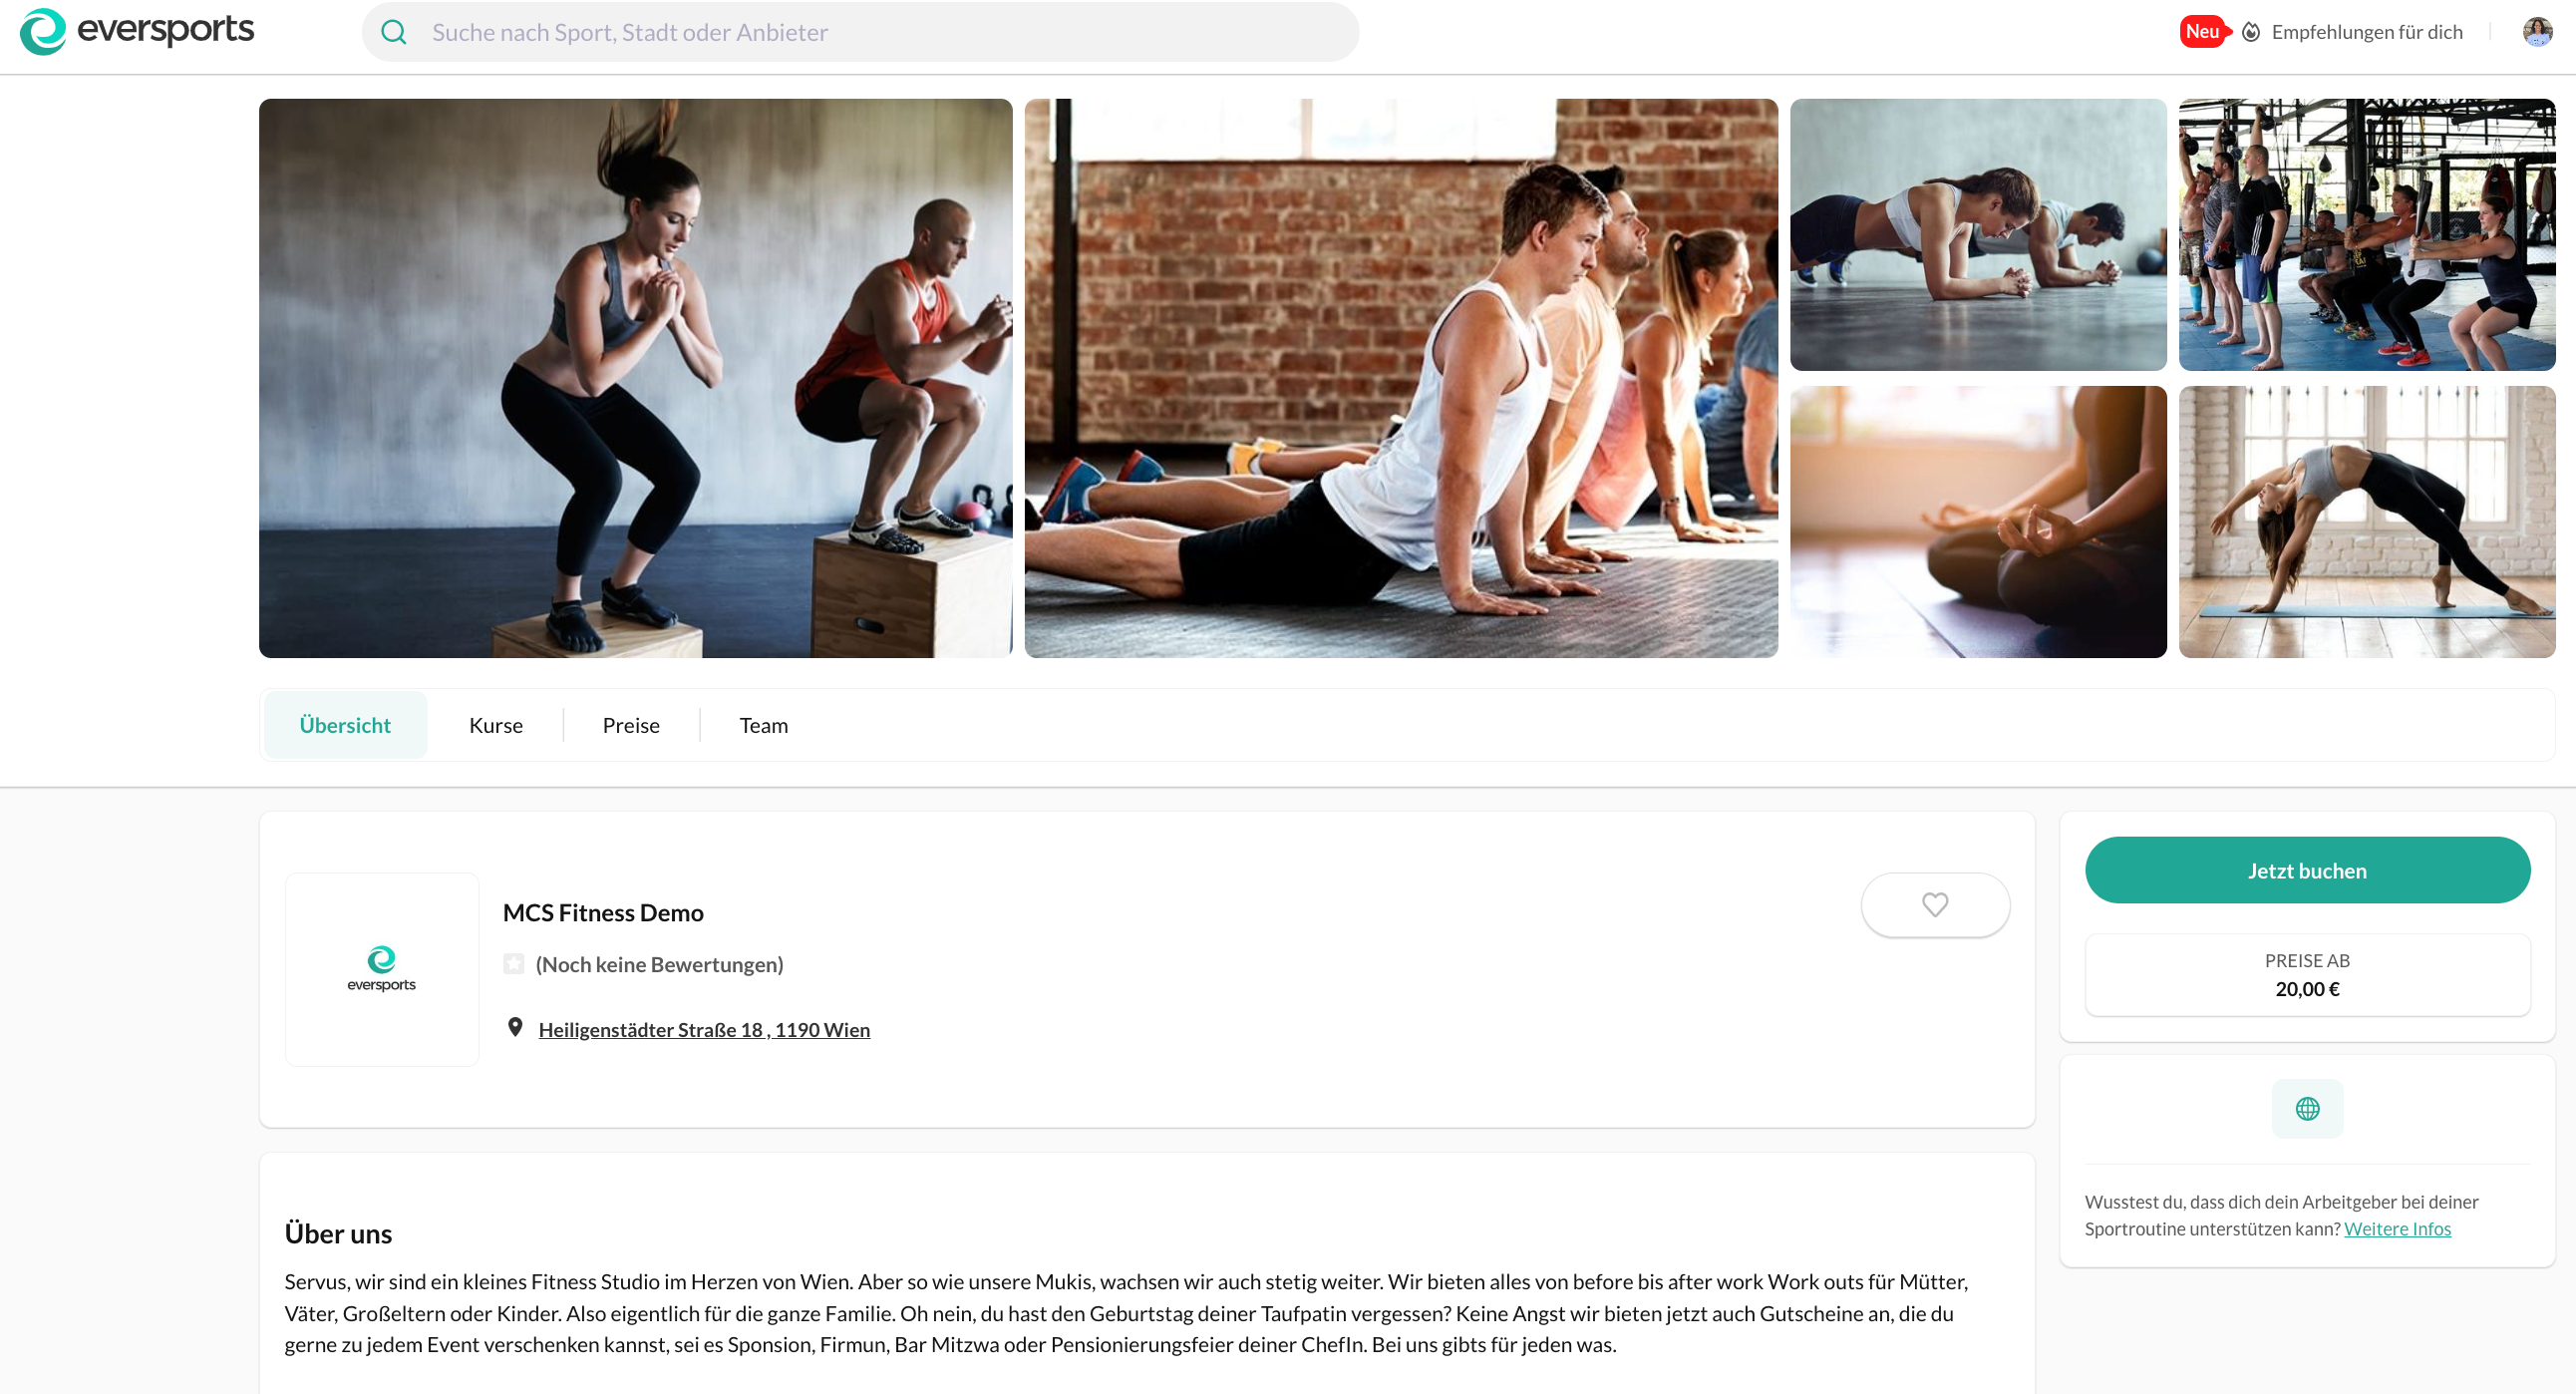
3. Example Profile Preview
Once everything is complete, your studio profile will look polished and professional — just like this (more information in this article):