1. Benefit of using customer groups
The customer groups serve to structure your customer administration.
You can either work only with the existing default group or add more groups. This makes sense if you want only some customers to be able to purchase a specific product or take part in an activity.
-
Products that are limited to a specific customer group are NOT visible to other customers.
-
Activities that are limited to a specific customer group remain visible for all customers. However, only the respective customers can book them.
Important: The customer group has nothing to do with the access rights. Just because someone belongs to the customer group "Employees" doesn't necessarily mean he has employee access. Login rights for all your employees and teachers must be defined separately.
2. Create and edit customer groups
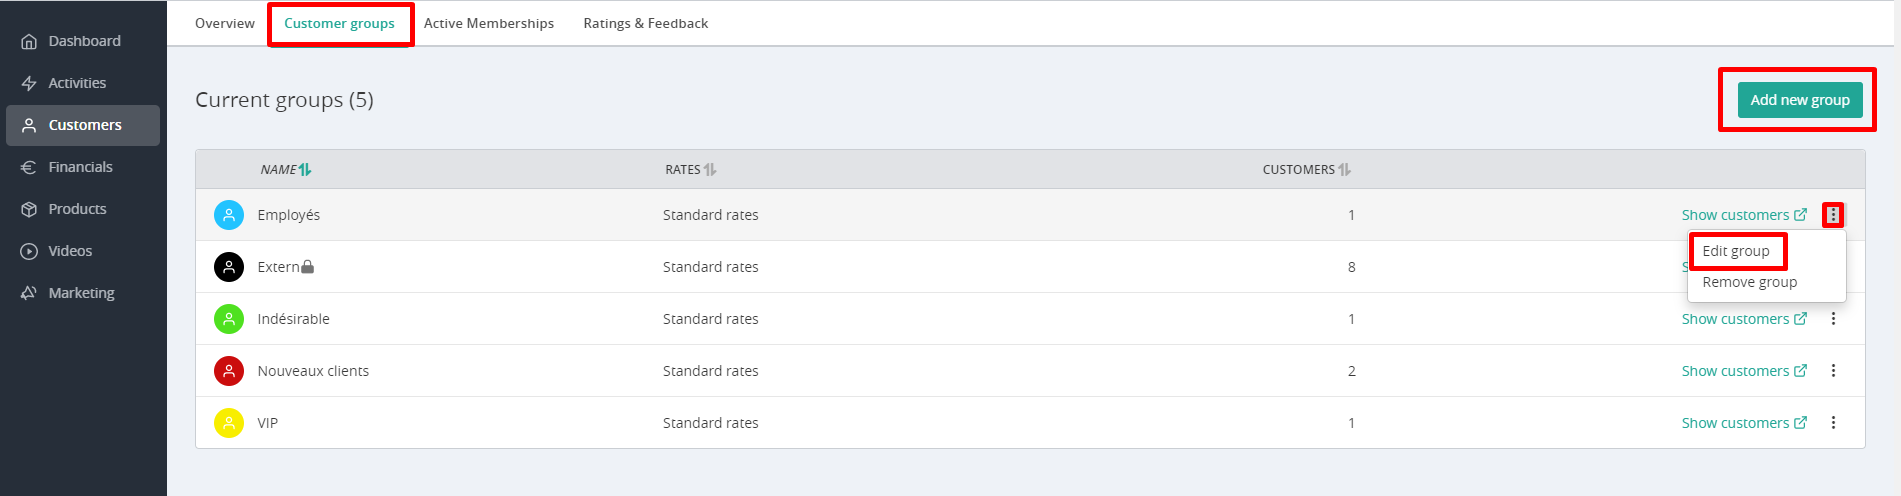
Click on menu Customers and select the tab Customer groups.
Here you can:
-
View existing customers groups (including the number of customers in that group).
-
Edit customers groups (by clicking on the 3 dots):
-
Restrictions
-
Online payment methods
-
Tax (VAT rates)
-
-
Add a new group. To create a new group, click on the button "Add new group" in the upper right corner.
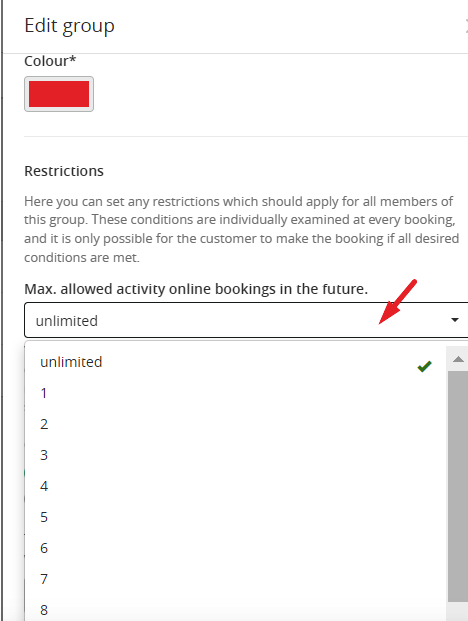
2.1. Restrictions
You can limit the number of future bookings for a customer group.
For example, if you choose 5, the customers in that group will only be able to make a maximum of 5 bookings in the future. Once a session has passed, they will be able to make a new booking.
2.2. Online payment methods
Define here which payment methods are offered for online bookings to the customer group.

2.3. Tax (VAT rates)
The VAT % for bookings is only relevant if you are using the Ballsport version of the Manager.
3. Add customers to a group
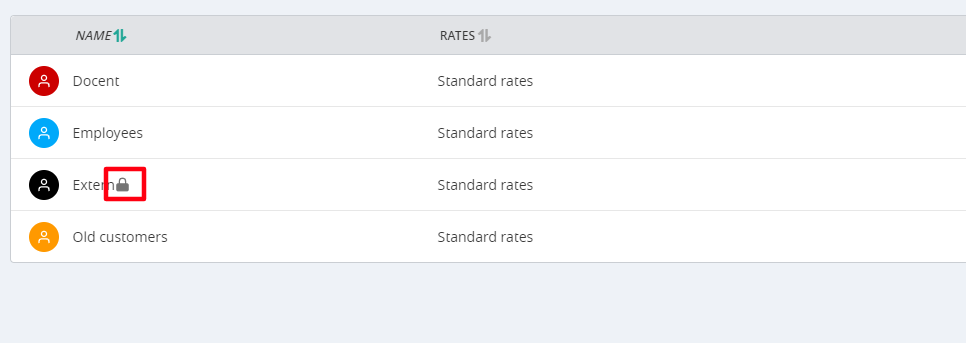
Customers who book online will automatically be added to the customer group with the lock icon ("Extern" group). They stay there until you move them manually to another group.
If you wish to change the base group to which customers are added, please contact us.
To change the customer group of one specific customer, you can do this directly in the customer profile of the respective customer: Edit customer > Group > Save.
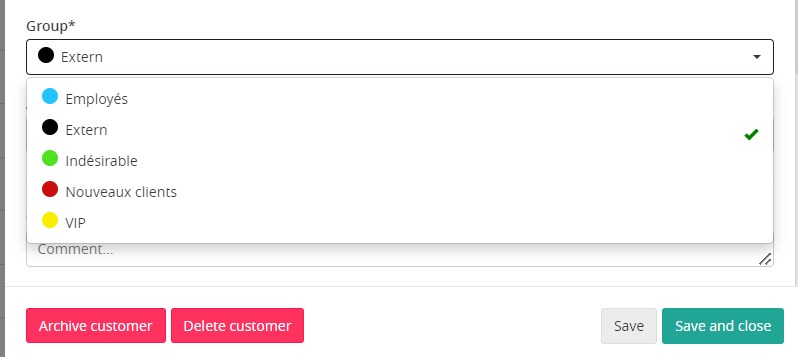
Note: Currently you can only add or delete customers in a customer group one by one. One customer can be assigned to one group only.
🏷️ Need more flexibility? Use customer tags to segment and communicate with your customers more effectively. Find out how here.