Give your customers the freedom to choose where they want to be. The Spot Booking extension helps you offer a premium booking experience by allowing your clients to select their favourite spot (e.g. a bike, reformer, or mat) when signing up for a class.
💡1. What is the Spot Booking Extension?
Spot Booking is an optional extension in the Eversports Manager that lets your customers select a specific spot in your in a class or training. It is especially helpful for formats like cycling, reformer Pilates, pole dance, boxing, or HIIT, where customers have a stronger preference towards participating on a specific spot.
You create a visual floor plan for each class or training and assign it to these activity types. Your customers will then see this plan during booking and can choose an available spot. If they've connected with friends via Eversports, they can even see which spot their friends reserved.
✅ 2. What are the Key Benefits of spot bookings?
- Better customer experience: Give your customers more control and comfort by letting them choose their preferred spot for your classes and trainings.
Customers booking via aggregators will be automatically assigned a spot. To prioritize your own customers, you can define priority spots - these are only available for direct bookings and will not be assigned to aggregator customers, unless all non-priority spots are taken already. In this case, also priority spots will be assigned to bookings of aggregator customers. - Stronger loyalty: Customers love consistency - allow them to sit next to friends or book their favourite spot in the room.
- Fewer surprises on-site: Less chaos at check-in. Everyone knows where they’re supposed to be.
- Easy setup: An easy-to-use floor plan editor lets you create your floor plans quickly.
- Fully integrated: Works seamlessly across the Eversports app, branded app, website widgets.
🔧 2. How can I set up spot booking for my classes and trainings?
Step 1: Activate Spot Booking
Go to the Market of your Eversports Manager and activate the free spot booking extension.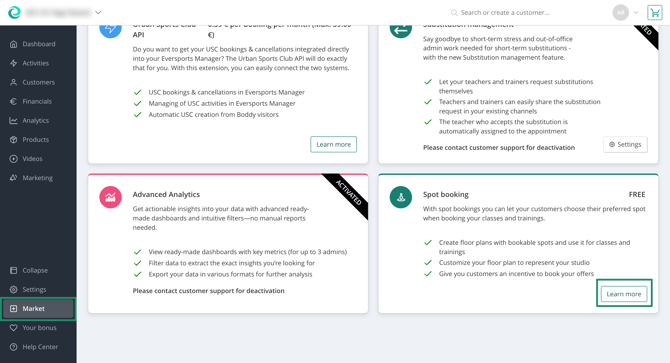
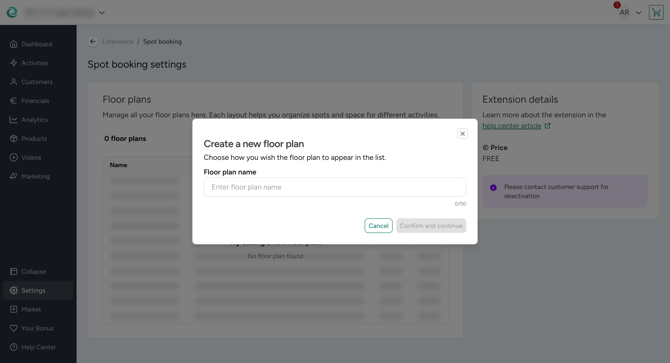
Step 2: Create Your Floor Plan
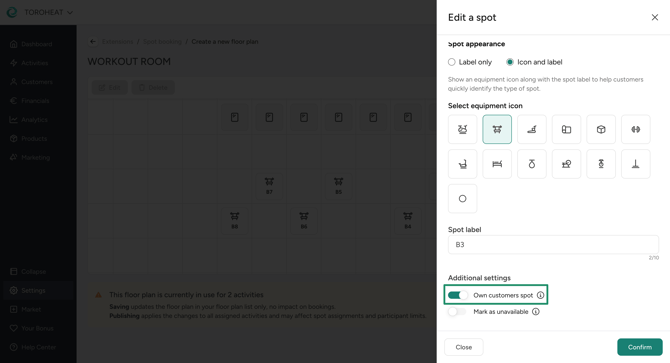
Access the extension settings via the Market and start by creating your first floor plan. Add the number of bookable spots that you can offer to your customers. You can choose specific icons and/or labels for the spots.

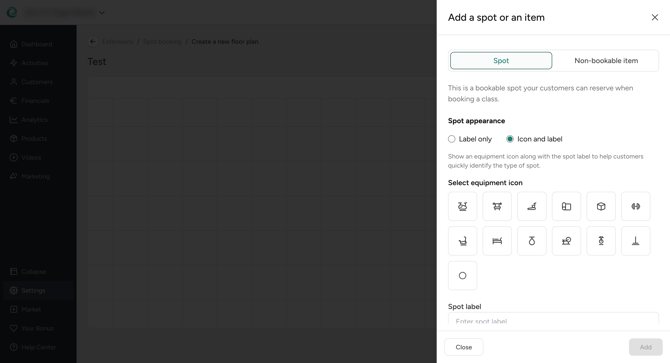
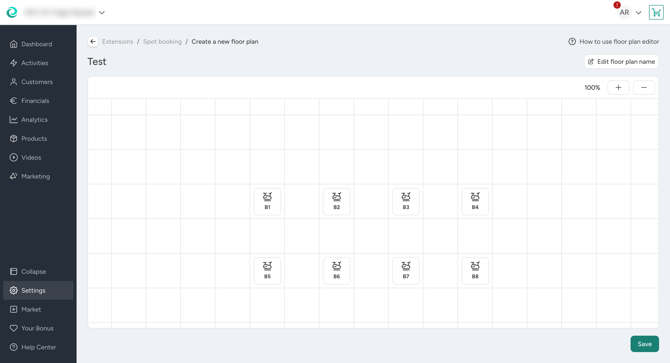
For better orientation, we suggest you also position important other, non-bookable items in the floor plan, e.g. the trainer position, mirrors, speakers, etc. Once you have finished building the floor plan you only need to save it.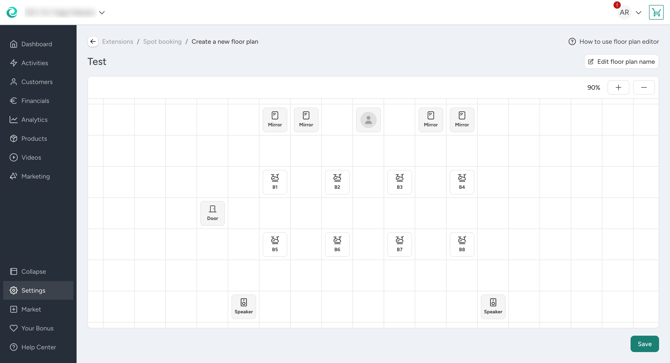
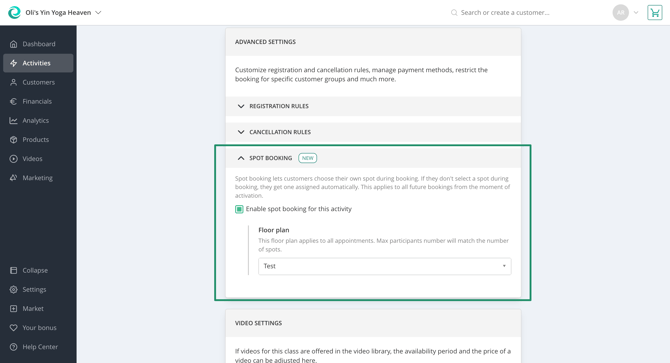
Step 3: Enable spot bookings for activities
Once you have created your first floor plan, you can edit the activity that you want to enable spot booking for in the Activities section of your Manager. You can find an option to do so in the Rules tab of an activity’s settings. Just enable the spot selection and link the floor plan that you want to use for this activity. Going forward, your customers can choose a spot for all appointments of this activity. In case you already have existing bookings of this activity in the future, spots will be assigned randomly.
Note: If the number of bookable spots differs from the max. participant limit of (an) appointment(s) of this activity, the max. participant limit of future appointments will be automatically set to the number of bookable spots.
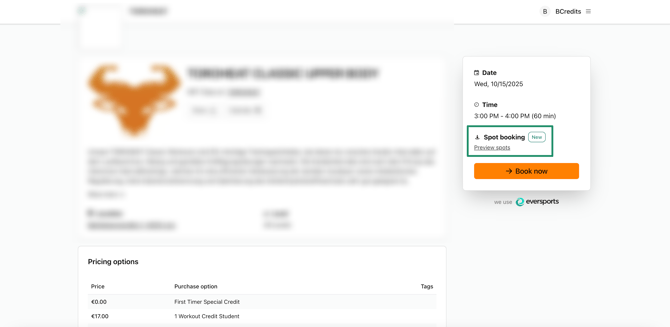
Step 4: Customers can choose their spot
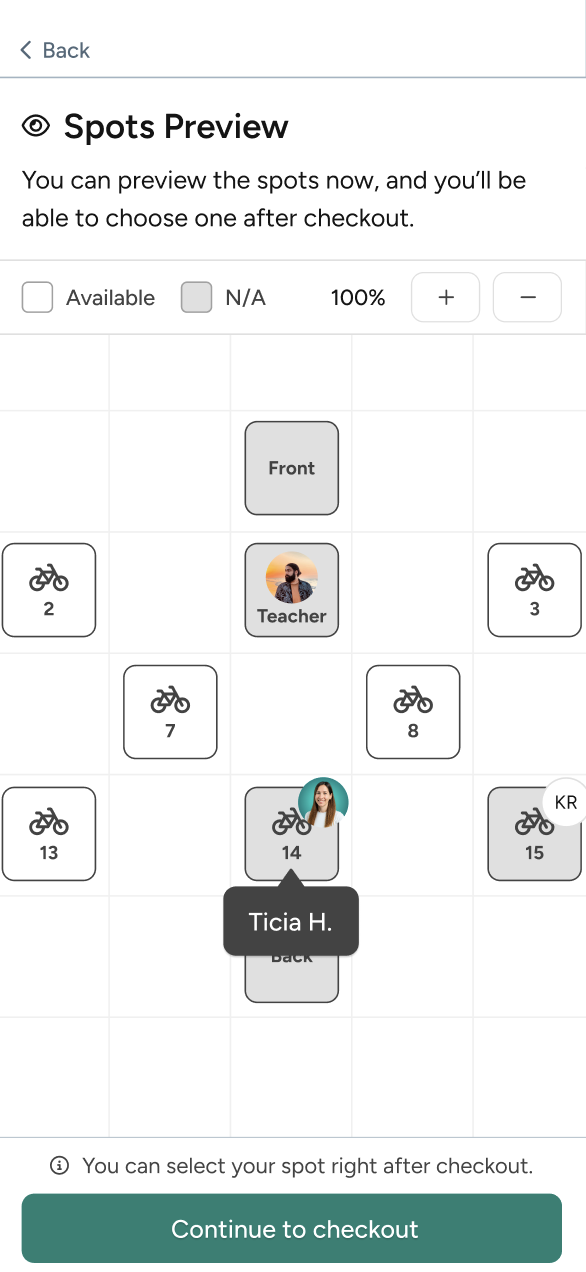
When customers look at an activity they can look at the floor plan preview to see if their favourite spot is free and where their friends are seated. There, they can see which spots are still available.
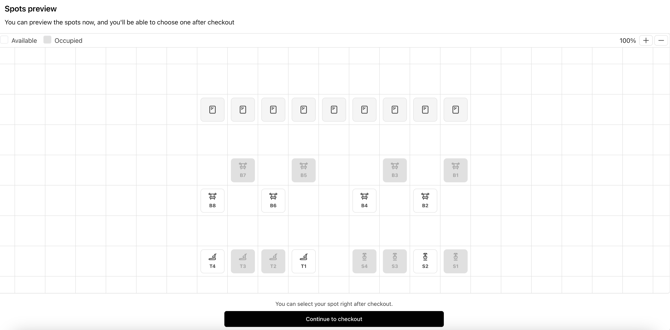
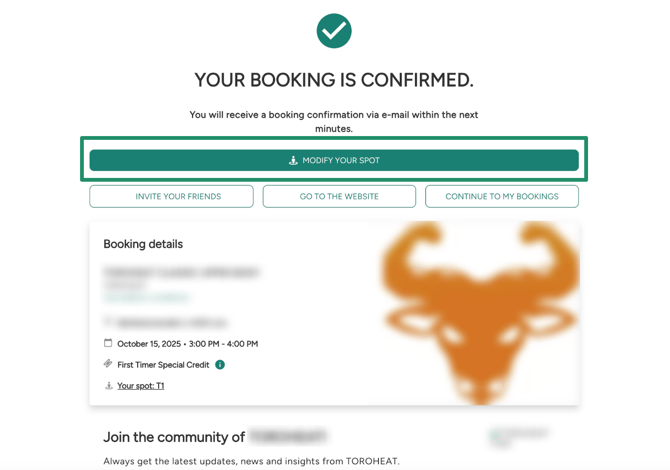
When they complete the booking, a spot will be assigned to them automatically. However, they can immediately modify their spot after the booking has been completed in case they want a specific one.

If you book a customer in via the Eversports Manager a spot is assigned automatically. Of course, you can change the spot if the customer prefers a different one.
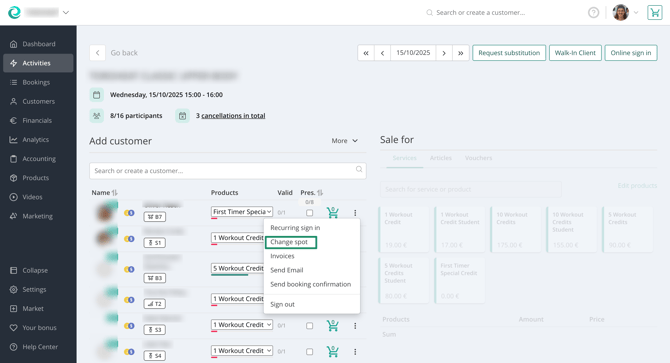

Step 5: Remind the customers of their spot during check-in
When the customers are checking in, your teaching staff can see the spot that is assigned to each customer. Remind them on the spot they have booked when they come in to avoid confusion.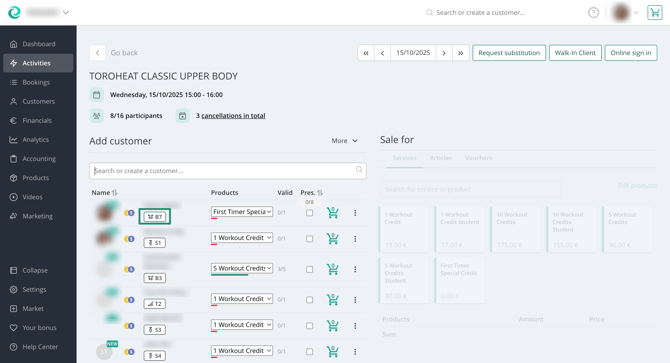
📝 4. Important to Know
- One plan per activity by default: When you enable spot booking for an activity the chosen floor plan will be applied to all appointments of this activity by default. However, you can override the plan for individual appointments if needed. To do so, just edit the appointment, e.g. via the activity calendar.
- Every booking will have a spot assigned: Anytime a booking is done for an activity that uses spot bookings a spot is automatically assigned to the bookings. There are rare cases in which there might be bookings without a spot (e.g. a bike broke down and can’t be replaced immediately).
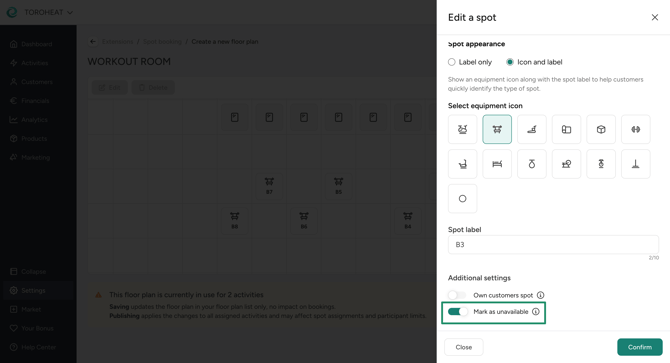
- You can temporarily disable spots: In case something breaks down you can temporarily disable a spot via the floor plan. This will remove the spot from future bookings and reduce the max. participant limit by 1. Once you enable it again, the participant limit is updated and future bookings without spot assigned to the available spot again.
- Adding/editing/removing bookable spots of a floor plan affect the future: Such actions lead to an automatic adaption of the max. participant limit of future appointments of activities that have this floor plan enabled for spot bookings. Also, future bookings will be updated accordingly. If a spot has been removed that was assigned to future bookings it will be removed from the booking and another spot assigned (if there’s a free spot available). Past bookings or appointments are not affected by these changes.
- Changing a floor plan: If you update a floor plan that is already linked to existing activities, the new version will automatically apply to all future appointments and bookings. However, past bookings, including their assigned spots, will remain unchanged and are not updated retroactively.
- Aggregators are supported: If customers book through aggregators such as Urban Sports Club, Wellpass, or others, the system auto-assigns them a free spot. If you use priority spots for own customers non-prioirty spots will be booked for aggregators first.
- Available for classes & trainings: Spot booking is supported for the activity types “classes” and “trainings”. For all other activity types, especially those where customers can book multiple appointments across different locations at once, spot booking is currently not available.
🎯 5. Best Practices
- Name your spots clearly: Use intuitive labels like “Bike 1”, “Front Mat”, “Window Row”.
- Add non-bookable items such as trainer, mirror, etc. to the floor plan: This helps customers orient themselves in the room and find their preferred spot.
- Prioritize your own customers: You can mark specific spots of a floor plan as priority spots for your own customers. This means that if a booking comes in from an aggregator, priority spots are not assigned to it. Only if all non-priority spots are occupied, priority spots will also be assigned to aggregator customers.
- Highlight the friends feature: Tell your customers to connect with their friends via the Eversports app so that they can see who of their friends participate in your classes and where they are seated.
❓ Still Have Questions?
Feel free to reach out to our support team - we’re happy to help you get started or collect your feedback to make this feature even better!