1. Accessing the Sign-in Area
-
Navigate to the Activities menu.
-
Select the desired activity.
Click the green Sign-in button.

You'll see a list of all participants for the selected session, along with relevant details such as:
-
The product they used to book
-
Product validity
-
Any customer notes
2. Steps to Sign-in New Participants
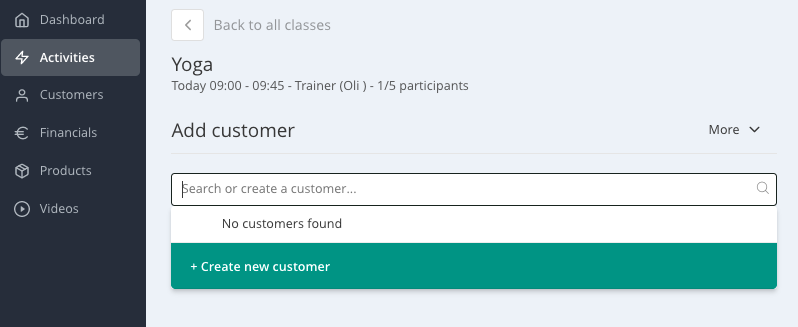
2.1. Add a New Participant
-
Use the search bar to find the customer.
-
If they don't exist in the system, create a new customer profile.
-
After creation, invite them to set a password, enabling them to book future classes online.
Important: If you manually add a participant to an activity, they will not receive a booking confirmation email.
Note: Once a customer is signed in - regardless of being marked as present - the booking is deducted from their selected product.
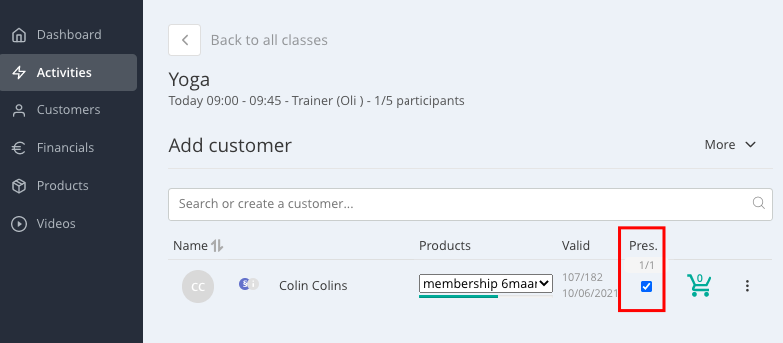
2.2. Mark participants as present
-
Tick the checkbox next to the participant's name to mark them as present.
-
This action helps maintain accurate attendance records and activity insights.
2.3. Sign-out participants
-
Click the three dots next to a participant's name.
-
Select the option to sign them out of the activity session.
-
Credits will be automatically returned unless it's a late cancellation, in which case the credit isn't refunded.

2.4. Contact and Export participants
-
Click the "More" button to:
-
Export a list of participants.
-
Send emails to all participants, useful for last-minute updates.
-
-
If a participant lacks an email address, the system will notify you.

2.5. Sell products
-
Click the shopping cart icon next to a participant's name.
-
This allows you to sell them an active product, especially if they have an open booking without a valid product.

Important: Online bookings always require a valid product.
3. Symbols in the Sign-in

3.1. Name
- You can assign a photo to a customer by clicking on the grey circle displaying their initials. You can either take a new picture using your device's camera or upload an existing image.
- The green "NEW" sign indicates a new customer. It marks their first participation. Once you mark this participation as "present", the "NEW" sign will no longer appear for future bookings by this customer.
-
The red exclamation mark (!) indicates a required action and typically warns of issues such as outstanding or unpaid invoices.
-
The yellow information symbol (i) indicates important customer information and signifies a note added in the customer’s master data.
- The blue paragraph symbol (§) shows that the customer has not yet accepted either the current general terms or the privacy policy.
-
Clicking on any of those three symbols (exclamation mark, information or paragraph symbol) allows you to:
-
Send the customer a payment reminder
-
Add a new note or remove an existing one

- By clicking on the customer’s name, you will see an overview containing various details about the customer, including their contact information and current products.

3.2. Products
Here you can select from the drop-down menu the product which should be used for this participation. There are either several valid products here you can choose from, one valid product or none. For the first two options you will see a green or red bar underneath the text field. It indicates the rest validity of the chosen product. In case there is no valid product available, the bar is colored red. It means that the customer doesn't have a valid active product for this participation.
3.3. Valid
This section shows how many visits have been booked using the selected product and the remaining units. If the product is valid for a specific time period, the expiry date will be displayed below the visit count.
3.4. Pres. (presence)
Before the class starts, confirm participant attendance by ticking the checkbox next to each attendee’s name. This helps you track attendance and possible no-shows in both the activity reports and the customer profiles.
You can sort the participant list by clicking on the grey arrow icon.
✅ Note: Mark the customers present is not mandatory, but it allows you to perform analyses later on.
➡️ You can find further articles with more information in the Sign-in chapter of the Help Center