In this article we show you how to get started with private sessions and explain to you how to manage private session appointments.
Private Sessions are currently in BETA.
This means the feature is still evolving. You can already use it in your daily operations, but some functions are still being improved or might be subject to change. You can find more info on the limitations here. By providing us direct feedback, you help us refine the experience and shape the final version.
🛠️ 1. How can I start managing private sessions?
In order to start managing private sessions in your Eversports Manager, you only need to complete the following two steps:
- Activate the extension and define the basic extension settings
- Create private session offers
1.1 Extension activation and setup
You can enable the free private session extension by navigating to the Market section of your Eversports Manager and activating it via the “Learn more” button. Just complete the activation process by following the different steps. 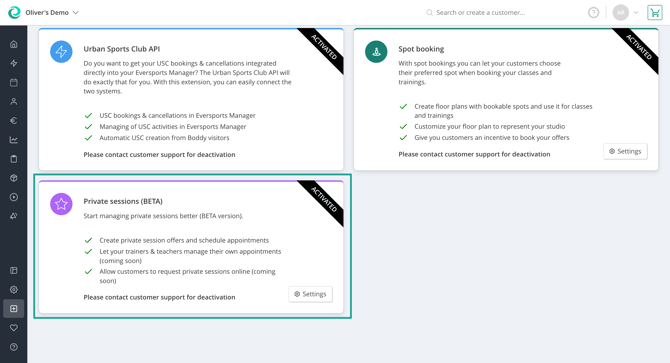
Once activated, you can access the extension settings via a click on the button. Here, you can define the following things:
- The email inbox in which notifications are sent to
- The preference if you teachers and trainers are allowed to manage their own appointments (independently of the role they have assigned)
- Booking- and date-specific availabilities needed for the online booking (you can find more info on availabilities here)

1.2 Creating a private session offer
When you navigate to Activities you can find a new tab called "Private session offers". There you can create all the different private sessions that you want to schedule appointments for.
In this new activity type, besides all the basic info, you can define the duration, max. participants, location and needed resources such as teachers/trainers, and rooms for a specific offer.

In the 2nd step, you define:
- Which products allow customers to participate in a private session
- How many units should be deducted from the product for one booking
- If you want this offer to be bookable online and related options
- How the cancellation conditions look like
- If you want to reuse this private session offer as template to quickly create other new offers.

📆 2. How do I manage private session appointments?
Once you have setup private session offers, you can schedule private session appointments in the private session calendar that you find in your Activities section of the Manager. Let’s have a look at the following tasks:
- Scheduling private session appointments
- Editing private session appointments
- Cancelling private session appointments
In general, users with the roles Administrator or Leading Employee can manage private sessions by default. This means they can perform all 3 mentioned tasks for any appointment.
If you define in the extension settings that teachers and trainers are allowed to self-manage their appointments, they can create private session appointments for private session offers they are allowed to teach. They can edit their own appointments and cancel them. However, they cannot create, edit, or cancel appointments of other teachers and trainers.
2.1 Scheduling private session appointments
Simply click on the “Private Sessions (BETA)” option above the group activity calendar:
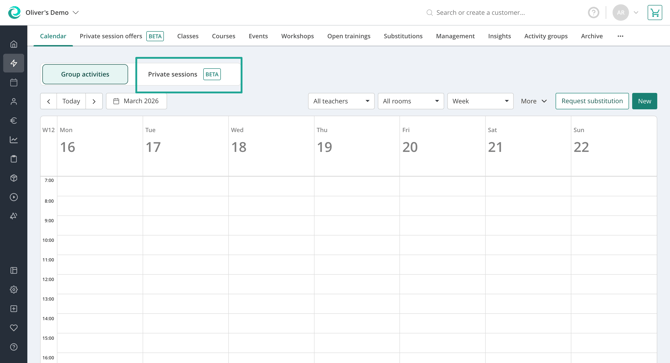
To create a new private session you can either click on the desired spot directly in the calendar or click on the “New” button on the right top and choose “Single or recurring appointments”.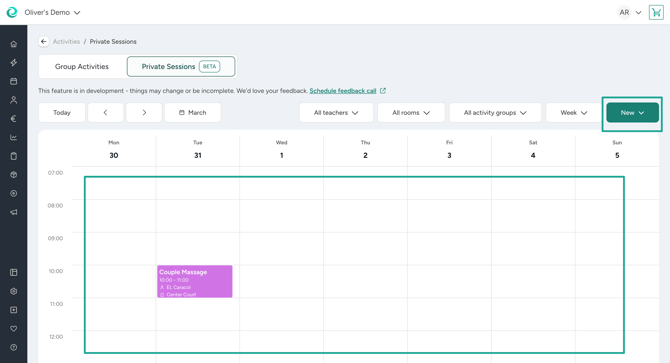
You can revise the date and time, recurrence options and potentially have to assign required resources such as rooms or teachers if the private session offer dictates having them.
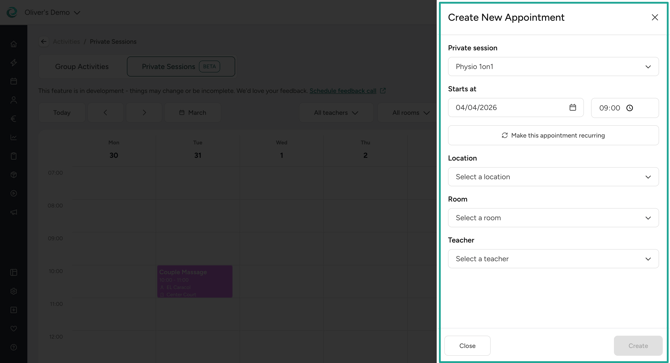
When you create a recurring appointment, you can choose a recurrence preset and either select a specific date when the recurring appointment should end or choose a number of appointments when it should be over.

After confirming the appointment, it is visible in the calendar. However, there is no customer assigned to it yet. To do so, you can find an icon in the appointment modal that brings you to the sign-in. There, you can sign-in customers as you are used to and sell them products like for other activities.

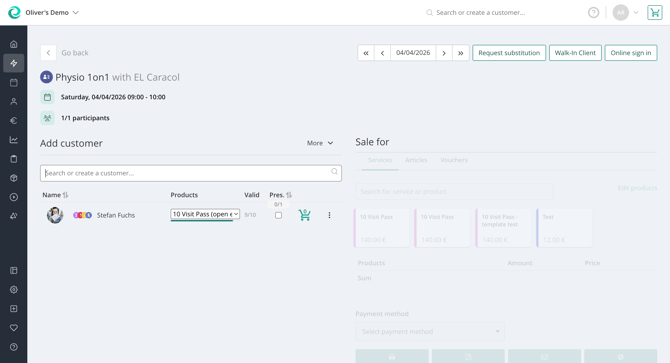
When you hover over the appointment in the calendar, you can easily find the most important info such as the start and end time, teacher or trainer, room and customer(s) assigned to the appointment.
⭐️ Pro Tip: To create a recurring private session for the same customer, create an individual appointment first, then sign the customer in and then edit the appointment to make it a recurring appointment. The customer will be signed-in automatically in the appointments of the created series.
2.2 Editing private session appointments
When you click on a specific appointment you can see an edit option on the top of the appointment details next to the other icons. By clicking on it, you can change the appointment’s details as wanted and save the changes.

Upon saving, you are asked if you want to send out the updated appointment info to the customer and can also add some additional info that will be included in the email. Depending on your choice, an email will be sent out.

When changing an appointment of a recurring appointment series, you will be asked if you want to update only this appointment or this and all future appointments. Choose your option consciously as this action cannot be undone.

In case a customer or teacher can’t be informed via email, you will be made aware about it.

2.3 Cancelling private session appointments
In the appointment details modal, when you click on an appointment in the calendar you can find the cancellation option as one of the top icons. You can cancel an appointment by clicking on it and defining some cancellation options. You can choose to still show the appointment in the calendar or remove it from there. Also, there is an info option to inform the customer and potentially the teacher via email. If you want to add additional info to the cancellation confirmation, you can add it to the message box before confirming the cancellation.
Also for the cancellation you will be able to choose if you only want to cancel this one appointment or this and all future appointments if it is part of a recurring appointment series.


As for the edit option, you will also be made aware of the fact that either a customer or teacher couldn’t be informed via email.
💡3. What else should I consider?
As the extension is still in a BETA version, there are certain limitations that affect the management of private sessions. You can find them in this article.
❓ Still Have Questions or Feedback?
To provide us feedback about your experience with the BETA version feel free to schedule a feedback call with one of the product managers working on this feature. This helps us to consider important feedback and improve the feature.
In case of questions free to reach out to our support team - we’re happy to help you get started or collect your feedback to make this feature even better!