You can make your private session offers available online so that customers can either book appointments directly or submit booking requests, depending on how you've configured the offer.This gives your customers more flexibility while reducing the need to arrange appointments manually.
In this article, you’ll learn how to set up online booking for private sessions
✨ Key Benefits at a Glance
- Let customers choose and book a suitable time online
- Offer either direct booking or booking requests, depending on your preferred booking flow
- Reduce manual appointment coordination and save time
- Offer flexible scheduling without adding fixed time slots to your schedule beforehand
- Avoid conflicts with teachers/trainers or rooms
📋 Before You Start
Before configuring booking requests:
- Make sure the Private Sessions extension is enabled
- Make sure you have already set up at least one private session offer
→ See: How to create and manage private session offers
🧑💻 Configure Online Booking for Private Sessions
In order to allow online booking (requests) for private sessions, you need to do 2 things:
- Activate the “Available online” option for the related private session offers and define the booking rules
- Share the private session offer - either via a booking widget or the sharing option
Follow these steps in your private session offer setup:
Set up your Private Session Offer for online availability
You can set up all that is necessary on the Private session offer:
1. Choose How the Offer Is Available Online
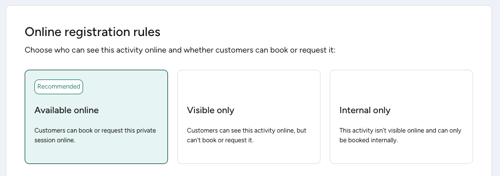
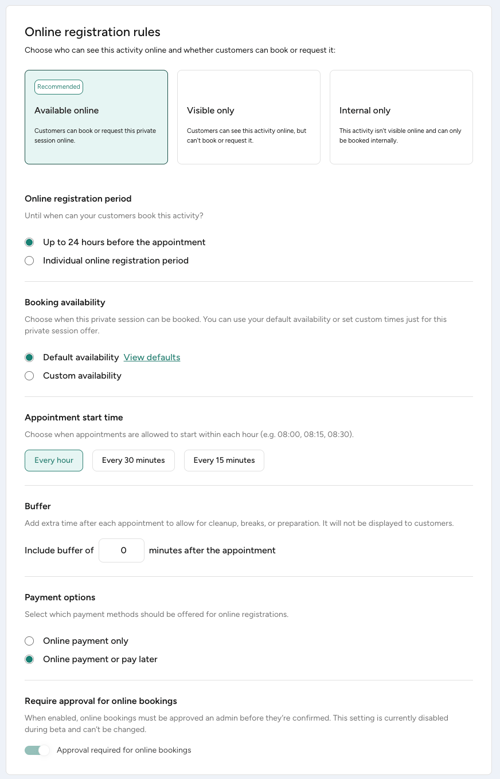
In the Online registration rules section, choose how your offer should appear:
- Available online → Customers can request bookings
- Visible only → Customers can see the offer but cannot book it online
- Internal only → Only visible in Manager
👉 To enable booking requests, select “Available online”
2. Set the Online Registration Period

Define when customers are allowed to send booking requests.
You can choose:
- Registration always possible
→ Customers can request sessions at any time (default: at least 24 hours in advance) - Individual online registration period
→ Define a time window
💡 Example:
If you set:
- From 7 days before
- Until 24 hours before
Customers can only request sessions within that time frame — not earlier than 7 days ahead and not later than 24 hours before the start time.
3. Define Booking Availability
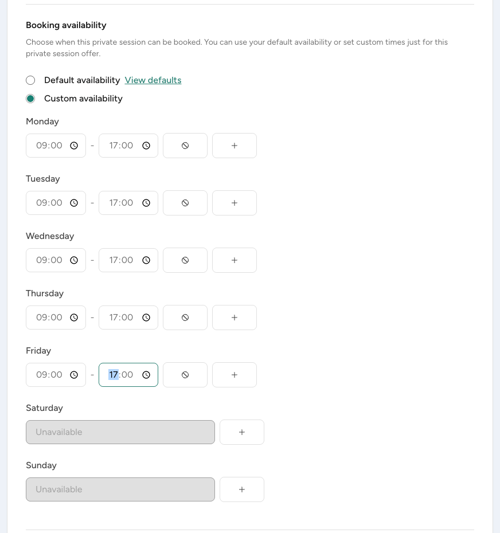
Choose how availability is applied to this offer:
- Default availability → Uses your default setup that you can define in your Private session extension settings in the Market
- Custom availability → Define specific timeframes for this offer
👉 This determines when customers can request sessions.
If you want to understand how availability and time slots are calculated:
→ See: How private session availability works
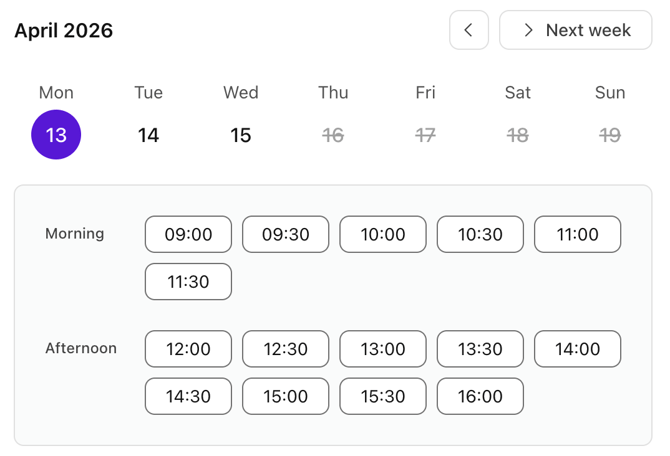
4. Set Appointment Start Times
Define how frequently sessions can start. This controls the starting time slots shown to customers.
- Every hour
- Every 30 minutes
- Every 15 minutes
- Every 10 minutes
| Setting | Starting time options |

|
|

|
 |

|
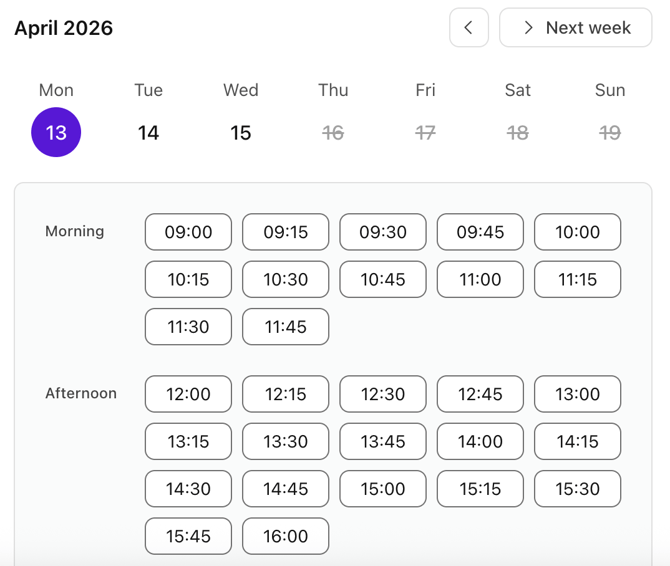 |
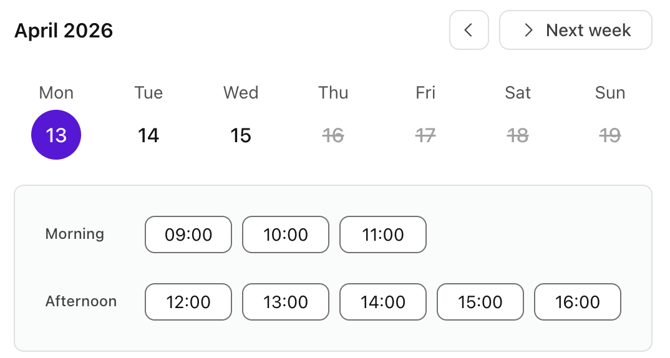
💡 Tips:
- For maximum flexibility, choose every 10 minutes
- For more structured schedules, align this with your session duration (e.g. hourly sessions → hourly start times)
5. Add Buffer Time (Optional)

Buffer time adds a gap after each session.
This blocks an assigned teacher/trainer and/or room for additional time after the session.
Use this to:
- Avoid back-to-back bookings
- Allow time for preparation, cleanup, or breaks
💡 Example:
A 60-minute session with a 15-minute buffer means the teacher/trainer and/or room is occupied for 75 minutes.
👉 Note:
Buffer time only affects spacing between bookings — not availability itself.
💡 Example:
A 60-minute session can still start at 11:00 within a 09:00–12:00 window, even with buffer time, as long as the session ends by 12:00 and there is not another session starting at 12:00..
6. Choose Payment Options
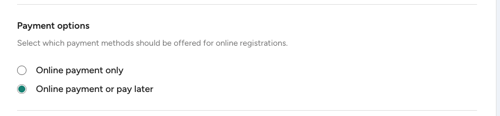
Decide how customers should pay:
- Online payment only
- Online payment or pay later
If you allow pay later:
- Customers can complete the booking request without paying online
- Payment is handled later (e.g. on-site)
💡 Tip:
“Pay later” is useful for:
- First-time customers
- Offers where commitment happens after confirmation
7. Choose Your Booking Flow
Decide how online bookings should be handled:
Require approval for online bookings (default)
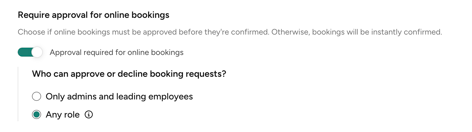
- Customers submit a booking request
- You review and approve or decline the request
- You have 24 hours to respond to booking requests
- Up to you to choose if teachers/trainers should approve their own bookings requests
Direct booking (without approval required)

- Customers can book available time slots instantly
- Confirmed bookings are added to your calendar automatically
- No manual approval is required
💡 Tip:
Choose the booking flow that best fits your business. You can switch between booking requests and direct booking options at any time.
Share Your Private Session Offer
Once your offer is set up, you can make it accessible to customers:
- Add it to your Activities widget (e.g. alongside your other specials like workshops or events, or create a widget just for your Private session offers on its own)
- Share a direct offer or availability link (get the links via the three dots (⋯) in your Private Session Offers overview)
→ See: Customizing your Activities widget
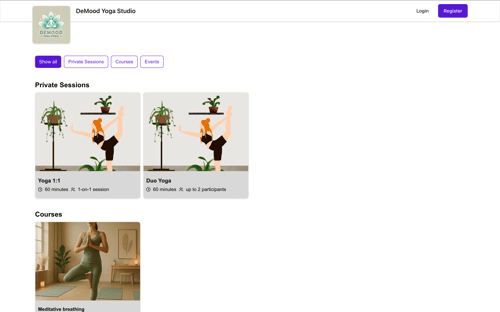
This allows customers to easily discover and request private sessions from your website, Branded App or campaigns.
Unlike group activities, private session offers are not displayed on the Eversports website or mobile app. Customers can only discover and book or request them through your website (using your widget), Branded App, or via a direct link that you share, making these sharing options essential.
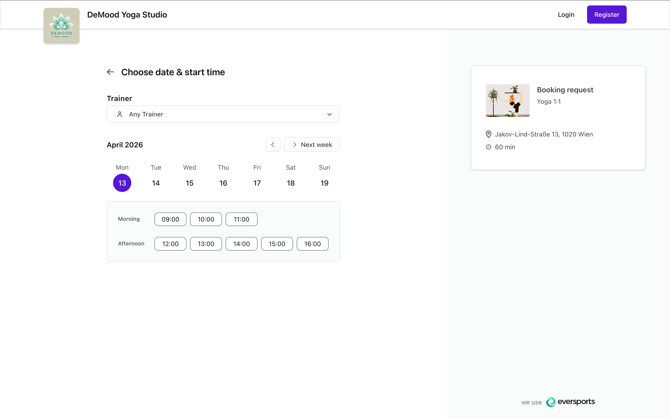
👀 What Customers Can See and Do
When customers access your private session (e.g. via your Activities widget or a shared link):
- They see available dates and time slots
- They can (optionally) select a teacher/trainer
- They go through the checkout process
- They either:
- Complete their booking immediately,
- or Submit a booking request for your approval within 24 hours
🔄 Manage Private Session Bookings
Once customers start booking private sessions, you can manage them directly in your calendar.
🗂️ Booking Requests
Booking requests are especially useful if:
- You want to avoid double bookings across teachers/trainers or rooms
- You have more complex scheduling setups (e.g. multiple teachers/trainers, rooms, or combinations)
- You need to coordinate schedules manually before confirming
- You want to screen or prioritise requests before accepting them
⚡ Direct Booking
Direct booking is ideal if you want customers to confirm available appointments instantly.
With direct booking:
- Customers book available time slots immediately
- No manual approval is required
- Confirmed bookings are added directly to your calendar
- You stay informed through email notifications about new bookings
🔗 Related Articles
- How to manage private session booking requests
→ Learn how to best deal with incoming booking requests for private sessions - How private session availability works
→ Understand how available time slots are calculated and what affects them - Managing teacher/trainer availability for private sessions
→ Learn how to define when teachers/trainers are available for private sessions - Customizing your Activities widget
→ Learn how to display your private sessions on your website alongside other offerings