Creating courses, workshops, retreats, events, camps, education works the same.
Tip: If you don't see these activities in the tabs of the menu "Activity", you can activate them any moment. You can do this in the menu Activities by clicking on the 3 dots to the right (more info here).
Step 1: Enter Basic information
Begin by providing the important details of your activity:
- Activity Title: Enter a clear and descriptive title.
- Description: Provide details about the activity.
- Activity Group: Assign a group to categorise the activity: this also determines its colour in the schedule
- Sport: Choose the sport under which the activity shall be found by your customers. If this menu doesn’t appear yet, you can activate it by going to Settings > Profile > Basic Information > Sports. Make sure to select at least two sports and click Save Changes in the bottom-right corner. The menu will only become visible once two or more sports are selected. Here you’ll find everything you need to know about your profile settings.
- Image: Upload an image representing the activity.
Tip: At the top, you can select a template from an already existing class to pre-fill settings.
Step 2: Define Rules and Settings
Booking Options:
Decide how participants will book the activity:
- Products: Participants use existing products (e.g., memberships, block cards) to book.
- Tickets: Create specific tickets for this activity, such as single-sessions or combination tickets.
Note: If a customer cancels a session that was booked with a ticket, the payment will be refunded to them. If a product was used instead, it will simply be returned to the customer’s Eversports account.
Important: This choice cannot be changed later.

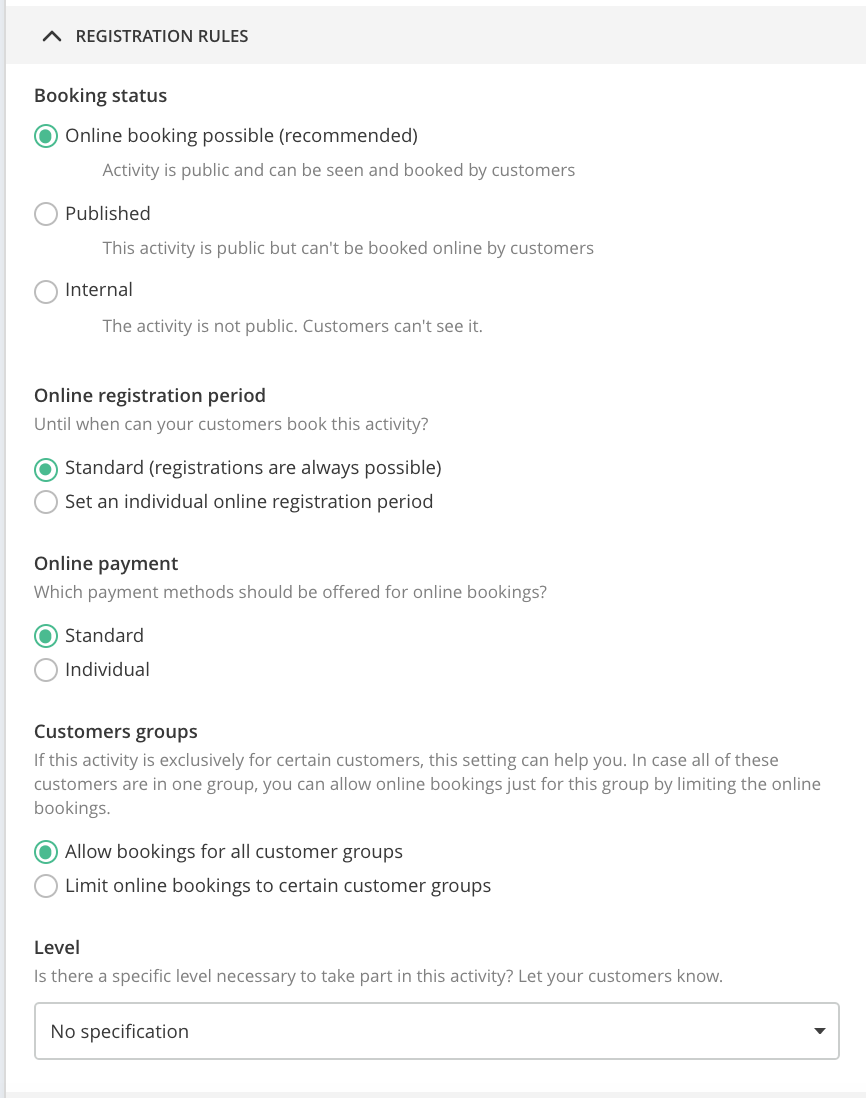
Registration Rules:
- Booking Status:
- Online booking possible: visible and bookable
- Published: visible but not bookable.
- Internal: The activity is not visible to the customer
- Online Registration Period:
- Standard: Uses default settings
- Individual online registration period: Set a specific start and end dates for registration.
- Online Payment:
- Standard: Applies default online payment settings (Settings > Master Data > Online Payment)
- Custom: Define specific payment options for this activity
- Customer Groups: Restrict booking to specific customer groups if desired.
- Level: Indicate If a certain experience or skill level is required (e.g., beginner, intermediate, advanced)
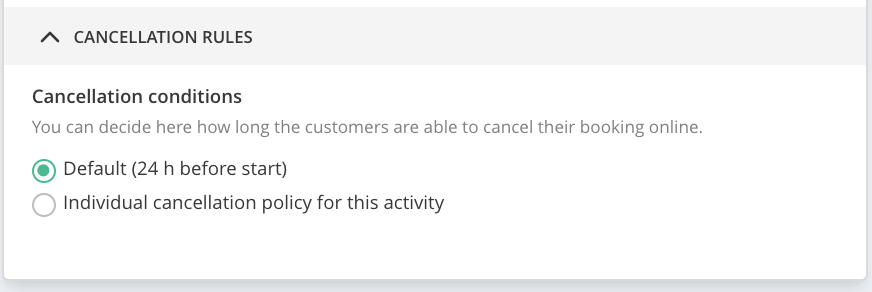
Cancellation rules:
- Set the deadline by which clients can cancel and automatically receive their credits back (default: 24 hours before the session starts). If they cancel after this deadline, the credit will be deducted. You can also enable automatic cancellations if the minimum number of participants isn't reached - customers affected will be notified automatically.
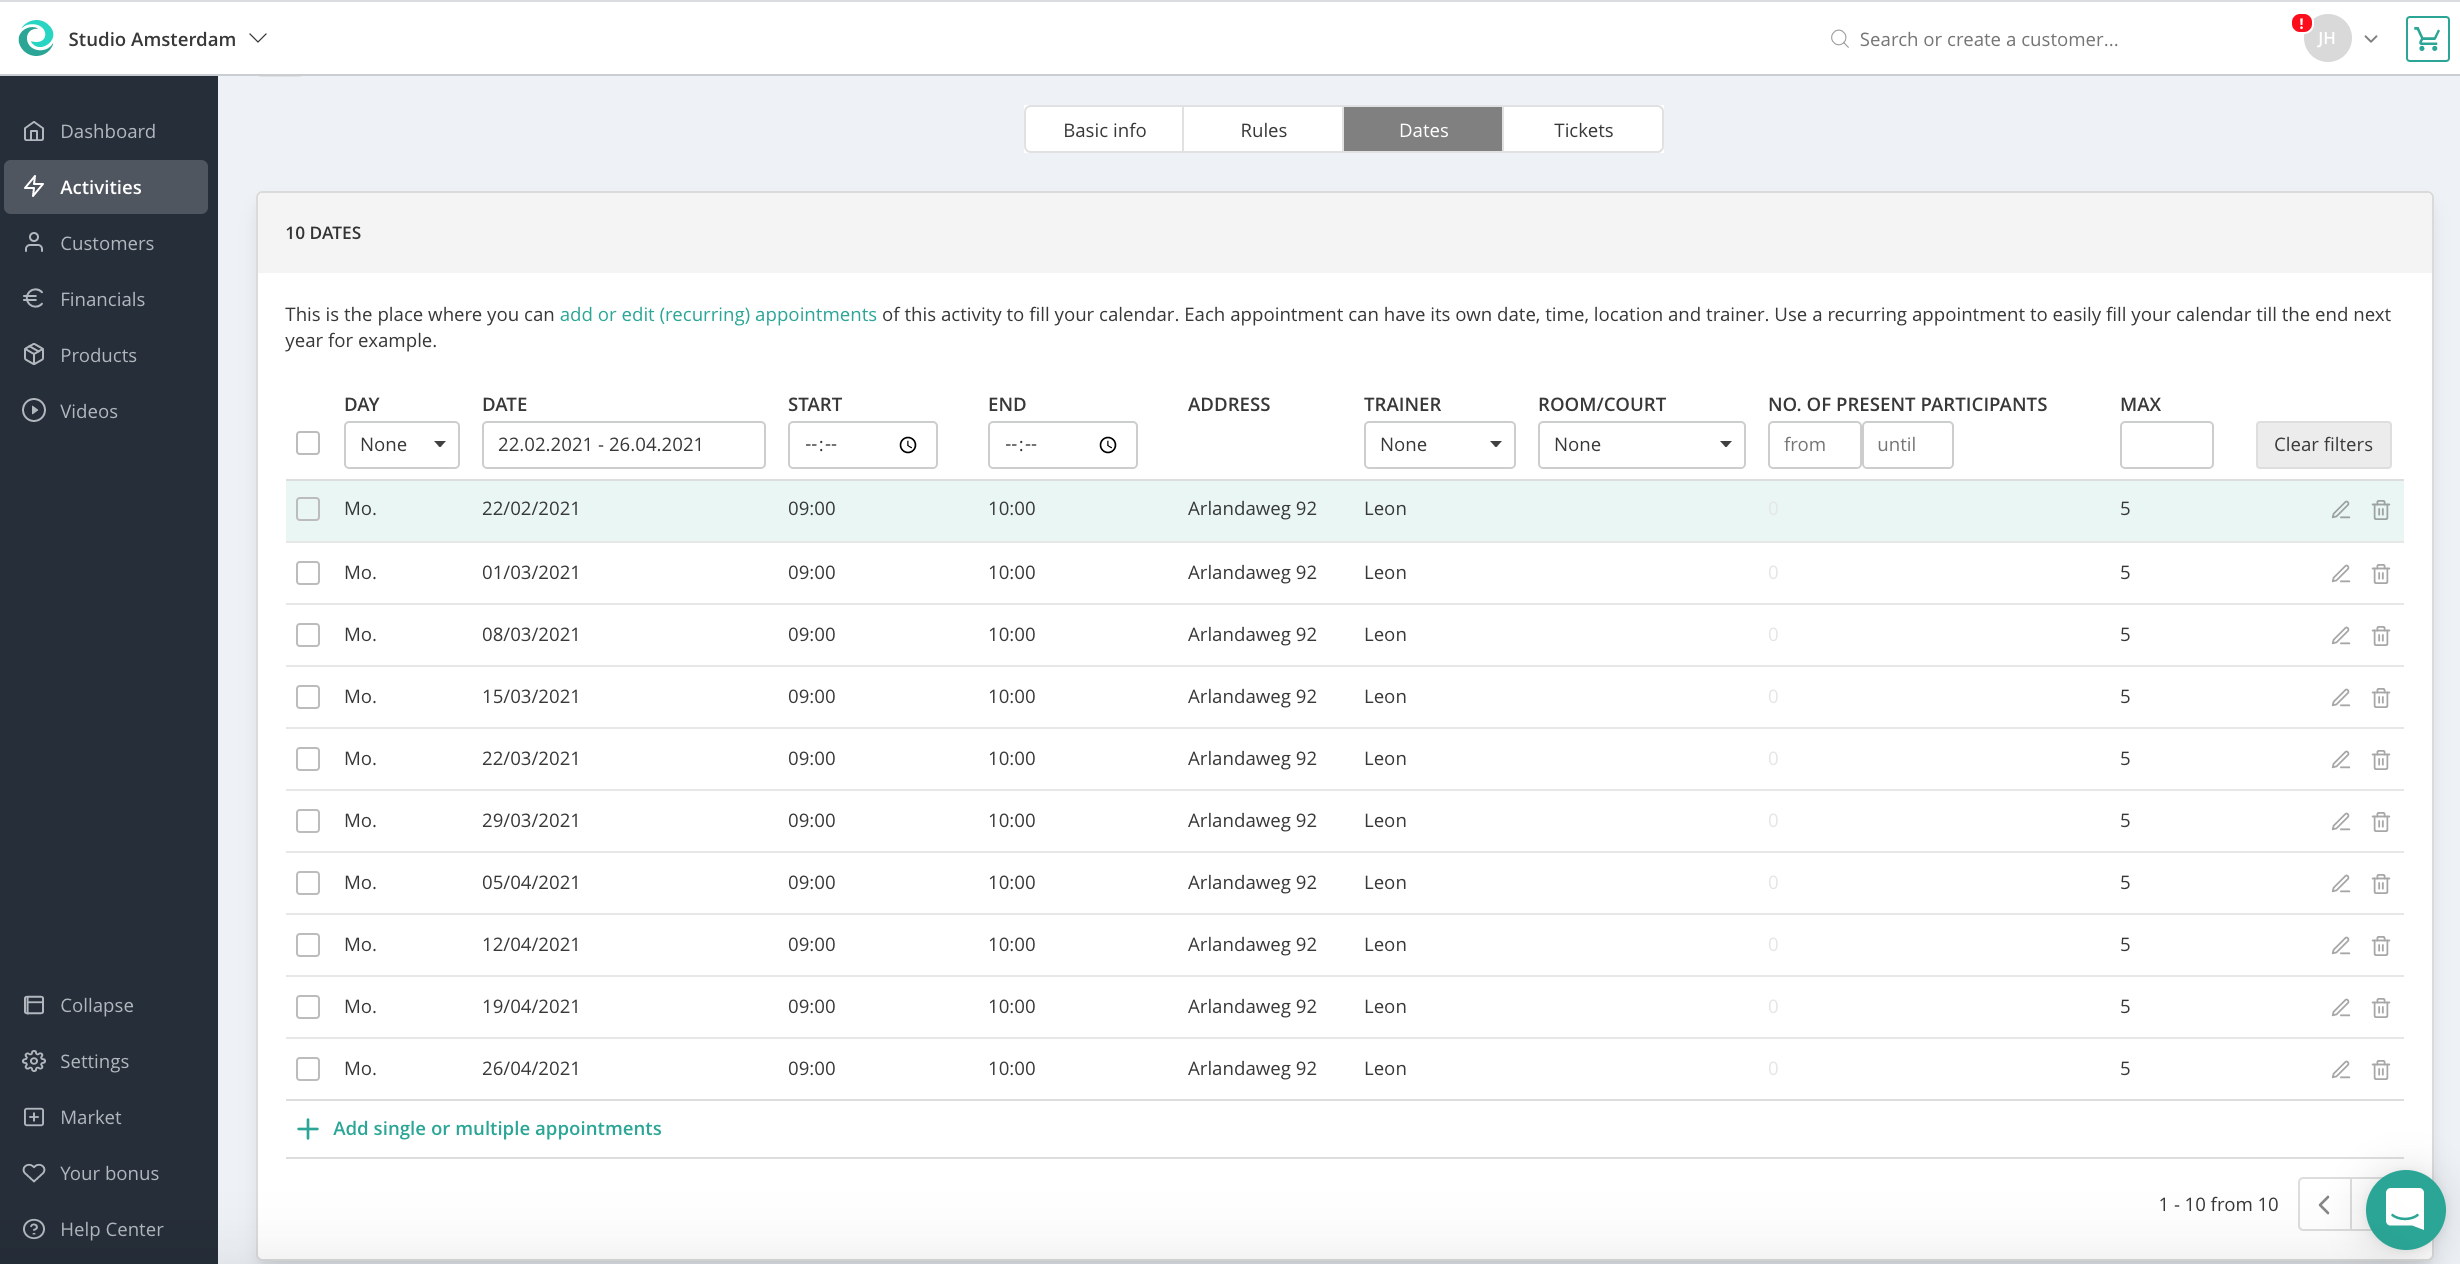
Step 3: Schedule appointments
-
Go to the Dates section.
-
Click the "+" to create one or multiple sessions for your activity. You can also use tickets - learn more in this article.
-
Set the start and end date, along with the start and end time.
-
Select the days of the week when the activity should take place.
-
Click Create new appointment to schedule.
You can edit all details at any time.
The following steps depend on your settings you set before:
- If you selected Bookable with products in step two, you're done and can simply click "Save" to complete the setup.
- If you chose the Single and combination tickets option, there’s one more step: creating the tickets. You can find detailed instructions on how to create single and combination tickets in this article.
Important: Don’t forget to save the page at the bottom!