Note: If you want to learn how to assign an existing membership to a customer, please click HERE.
1. Access the Customer Profile
-
Navigate to Customers in your Eversports Manager.
-
Select the desired customer.
-
Go to the Products tab, scroll down to Memberships.
-
Click on + Sell Membership.

A slide-in will appear on the right-hand side to configure the membership details.
2. Configure Membership Details
In the new window, you can set the following:
-
Membership: Choose from the memberships you've already created.
-
Start Date: Select the starting date of the membership.
-
Payment Method: Choose the appropriate payment method:
-
SEPA: The invoice amount will be automatically debited from the customer's bank account on the set due date.
-
Note: Ensure a SEPA mandate is added to the customer's profile under Customer Profile > Details > SEPA Mandate. You can find more information on our automated SEPA Online extension HERE.
-
-
Open: The invoice will be issued and marked as unpaid in Finances > Invoices. You'll need to manually mark it as paid once payment is received. Alternatively, you can send a payment link to the customer for online payment.
-
Bank Transfer: every invoice of the assigned membership will be issued and marked automatically as paid by bank transfer in Finances > Invoices.
-
Note: These payments are not processed through Eversports and should be verified directly in your company bank account.

3. Review Future Periods and Invoices
After selecting the membership, an overview of future invoices will be displayed. Review this to ensure all details are correct.

4. Edit Membership Settings (Optional)
In the Edit tab, you can adjust the membership settings individually for this customer if needed:

Note: Adjustments will be made for this customer only. The general membership templates will remain unaffected by the changes.
5. Finalise the Membership Assignment
Click Continue to view a summary of the membership. Ensure all details are correct.

Click Assign Membership to finalise the process.

The membership will now appear in the customer's profile under Products > Memberships, and the customer can sign up for activities accordingly.

6. Access Customer Invoices
You can view all invoices related to the customer's membership by clicking
-
See all invoices in the customer profile's Summary page.
-
The three dots in the top right corner of the customer profile and Show invoices.

All invoices associated with the customer's memberships will be listed here.
7. Invoices of the Membership
All invoices will be created with the status “Planned” in the invoice overview. As soon as the due date is achieved, invoices will be issued effectively with an invoice number.
→ i.e.: when you assign a membership, all invoices due at that moment will be issued with an invoice number. These are:
-
all invoices for past periods (if desired)
-
all invoices for future periods where the due date is today
-
invoices for partial periods
-
invoice for the entry fee (if available)
All further invoices are created with the corresponding payment frequency (with the status "Planned").
Attention: When assigning a membership manually with the payment type automated SEPA , the first collection is triggered 4 days after the invoice is created (so you still have time to make any corrections). All future collections will then be initiated on the day the invoice is created.
You can edit/cancel future invoices or set them due immediately. Simply click on the three dots on the right-hand side of the respective invoice:

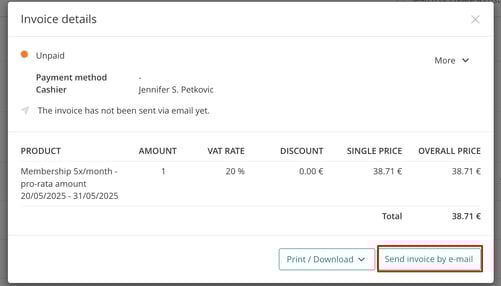
Note: An automatic email with the invoice will only be sent to the customer if they book their membership online themselves, and here only the first invoice will be sent. You can send all invoices manually at any time via Finance > Invoices: