In the menu Financials > Selling, you can sell products to your customers.
Let's see how to do this step by step:
⚠️ Important: Invoices and Test Purchases
Every invoice created in Eversports is automatically assigned a unique invoice number, see this article.This includes test purchases.
Once an invoice number is generated, it’s not possible to reset or adjust the invoice cycle to a lower number.
If you intend to use your own preexisting invoice cycle, make sure to update the start number before creating any test invoices.
👉 We highly recommend contacting our support team before making changes to the invoice cycle, as these changes cannot be reversed.
Where Can You Sell a Product?
You can sell products in several places within your Eversports Manager:
- Financials > Selling:

- in the sign-in of an activity:

- On the profile of the clients :

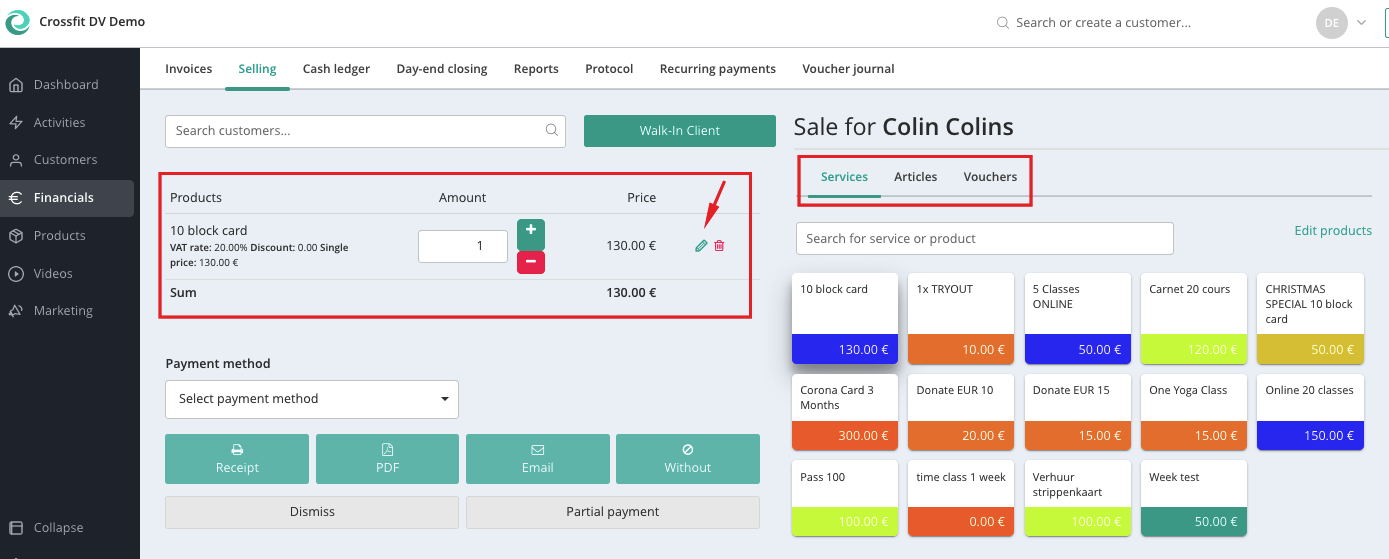
The most common workflow is via Financials > Selling. Follow the steps below.
Step 1: Select the Customer
First you have to choose who you wish to sell your products to:
- Existing Customer:
Start typing the customer’s name in the search bar. Once selected, the product will automatically be assigned to their profile.

- New Customer:
If you do not find the customer, you can directly create a new customer profile.
- Walk-in Customer:
For one-time or non-registered buyers (e.g. guests purchasing drinks or yoga mats). This allows you to track physical sales without needing full registration.

Step 2: Select the Product
Choose the product type you’d like to sell:
All items must be created in advance in the Products menu. Simply click on the desired product.
Here we distinguish between Services (block cards, time cards, etc.), Articles (coffee, yoga mats, etc.) and Vouchers.
Tip: Click the green pencil icon to give a discount or edit the product settings (e.g. number of credits).
👉 Want to sell a membership? Follow this article: 📄 Assign new memberships
Step 3: Choose the Payment Method
Select how the customer is paying:
- Only the payment methods you’ve enabled in Settings > Master Data will appear.
- Here you can find more info to check your payment methods in the Manager.
Step 4: Send the Invoice (Optional)
After completing the sale, decide how the invoice should be handled:
- Select if you wish to send an invoice or not. You can choose between the following options:
- Receipt: Opens a printable version in a separate window
- PDF: Generates a downloadable and printable invoice
- Email: Sends the invoice to the customer’s email address
- Without: Invoice is created but not sent or shown
⚠️ No matter which option you choose, an invoice is always created and saved.

Need to cancel an invoice? Check out this article: How to Cancel an Invoice