After completing the initial setup steps, it's time to dive deeper into your Eversports Manager. The following sections provide useful information to help you get to know your new system better.
1. Check Your Payouts and Wallet Balance
Navigate to the Billing menu in the top-right corner of your screen to:
- Check your wallet balance (online payments)
- Set up your monthly or weekly payouts
- View your Eversports invoices for software costs
This article explains everything you need to know about the Billing menu and your payouts.
2. Verify Your Data
Before you begin using Eversports Manager, it's important that all data is complete and up to date. Please ensure that:
- Your Eversports profile is complete, especially the pictures and descriptions.
- All your products, activities, and customers have been created.
- Your products are correctly linked to the appropriate activities.
If some customers already have products, you can easily assign these existing products to them. Check how to do this here.
3. Link to data protection and General Terms and Conditions (GTC)
Under Settings > Permissions & Privacy, you can store a link to your General Terms and Conditions (GTC) and your data protection policy. When your customers book online, they must accept these conditions during the booking process.
You can find more information here.
4. Activate automatic emails
You can activate different automatic emails, such as pre-visit email, a follow-up email and a birthday email.
Click here to find out how to activate automatic emails.
5. Integrate the schedule (widget) on your website
If you have not done so yet, we strongly recommend integrating your class schedule (widget) into your website. This makes it even easier for your customers to book classes online.
Other helpful articles: Learn how to integrate the new Eversports schedule widget on your own website and this article provides you with all the information regarding the old widget.
6. Teachers and employees
After creating a customer profile for your teachers and employees:
-
You can invite them by email.
-
They can log in to the Manager according to the login rights you have assigned.
-
It is important to tell them that they can log into the Manager on app.eversportsmanager.com. The Eversports application is for customers only. They can add the Eversports Manager to their home screen, more information is available here.
7. Invite your customers
If you have created your customers' profiles or if they have been imported:

-
You can invite your customers to give them the opportunity to create their Eversports account.
-
If you have assigned existing products to customers, these will appear in their profile once they accept the invitation and create their account.
-
If a customer does not see a product you have assigned to them on their profile, check whether they have accepted the invitation (see example picture on the right).
- If duplicate profiles exist, you can merge them.
-
If you want to delete a customer, read how to do it here.
- You can send this article to your customers or publish it on your website: Guide for your customers: find now your studio on Eversports!
-
Additionally, we recommend encouraging your customers to download the Eversports app. You can share this article with them.
8. Create courses, workshops, events etc.
There is a multitude of different activities that you can offer in your Eversports Manager:
-
Activities that need to be booked individually, such as classes and trainings.
-
Activities that can be booked all at once with one click, such as courses, workshops, events, etc..
So far, we have learned how to create classes and trainings. We now encourage you to also give it a try and now create courses and workshops too.
9. Eversports on mobile
You can, of course, use Eversports on your mobile phone.
Please note the following distinction:
-
Administrators and teachers can log into your Eversports Manager via app.eversportsmanager.com. In this article we show you how to use Eversports Manager as a regular app on your phone.
-
The Eversports App is only for your customers (athletes) to book classes and buy products. Learn here how your customers can use the Eversports app.
Tip 1: Additionally, you can share these articles with your customers to guide them through the use of their new Eversports account.
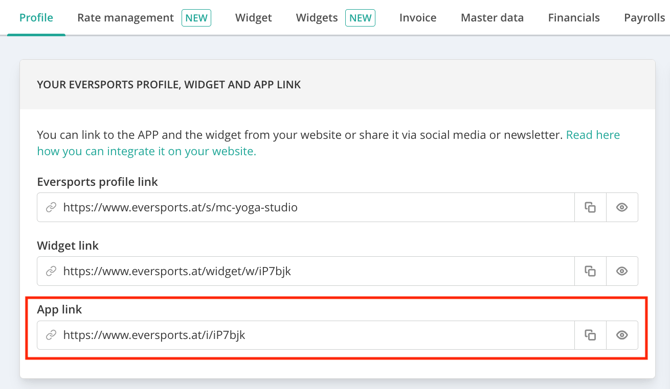
Tip 2: In the menu under Settings > Profile, you find the link to your app profile. This link is sent automatically when you invite your customers.
However, you can still share and promote this link in your newsletters or on social media.
10. Offering online classes or online trainings
If you wish to offer online classes or online trainings with livestream, we recommend the following articles:
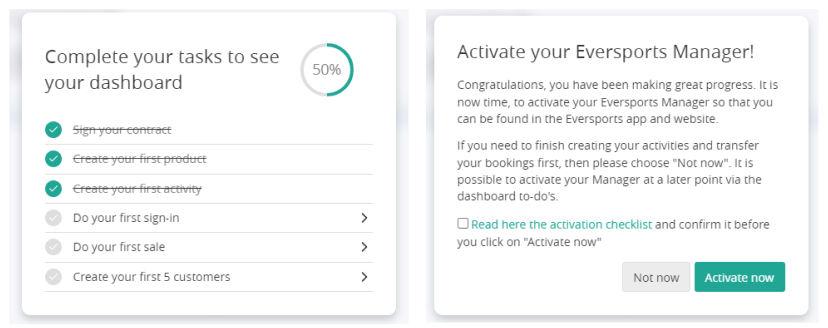
11. Activate your Eversports profile
After completing all these steps, your Eversports Manager is ready!
However, it will not yet be visible on the Eversports website and app. To make it visible, you can activate it in the menu under Dashboard.
If you have not yet completed your tasks but would still like your studio to be visible, you can write to us and we will activate it for you ([support@eversports.com] ).
We wish you all the best with your new system!